Hosting pre-recorded videos on the Virtual Wellness Platform
Outline
Live streaming is a great way to deliver services around the world and expand your client base exponentially. But if you’re only using the live stream function of Mindbody’s Virtual Wellness Platform yet, you’re missing out on a great opportunity in video on demand.
Video on demand allows clients to engage with your business 24/7 with pre-recorded video content. Content you upload can either be used as standalone videos, or as a complement to your other services.
Even better, adding pre-recorded videos to the Virtual Wellness Platform is quick and easy. In this article, we’ll review how to add pre-recorded videos to your video on demand library, and how to share those videos with your clients.
Adding pre-recorded videos
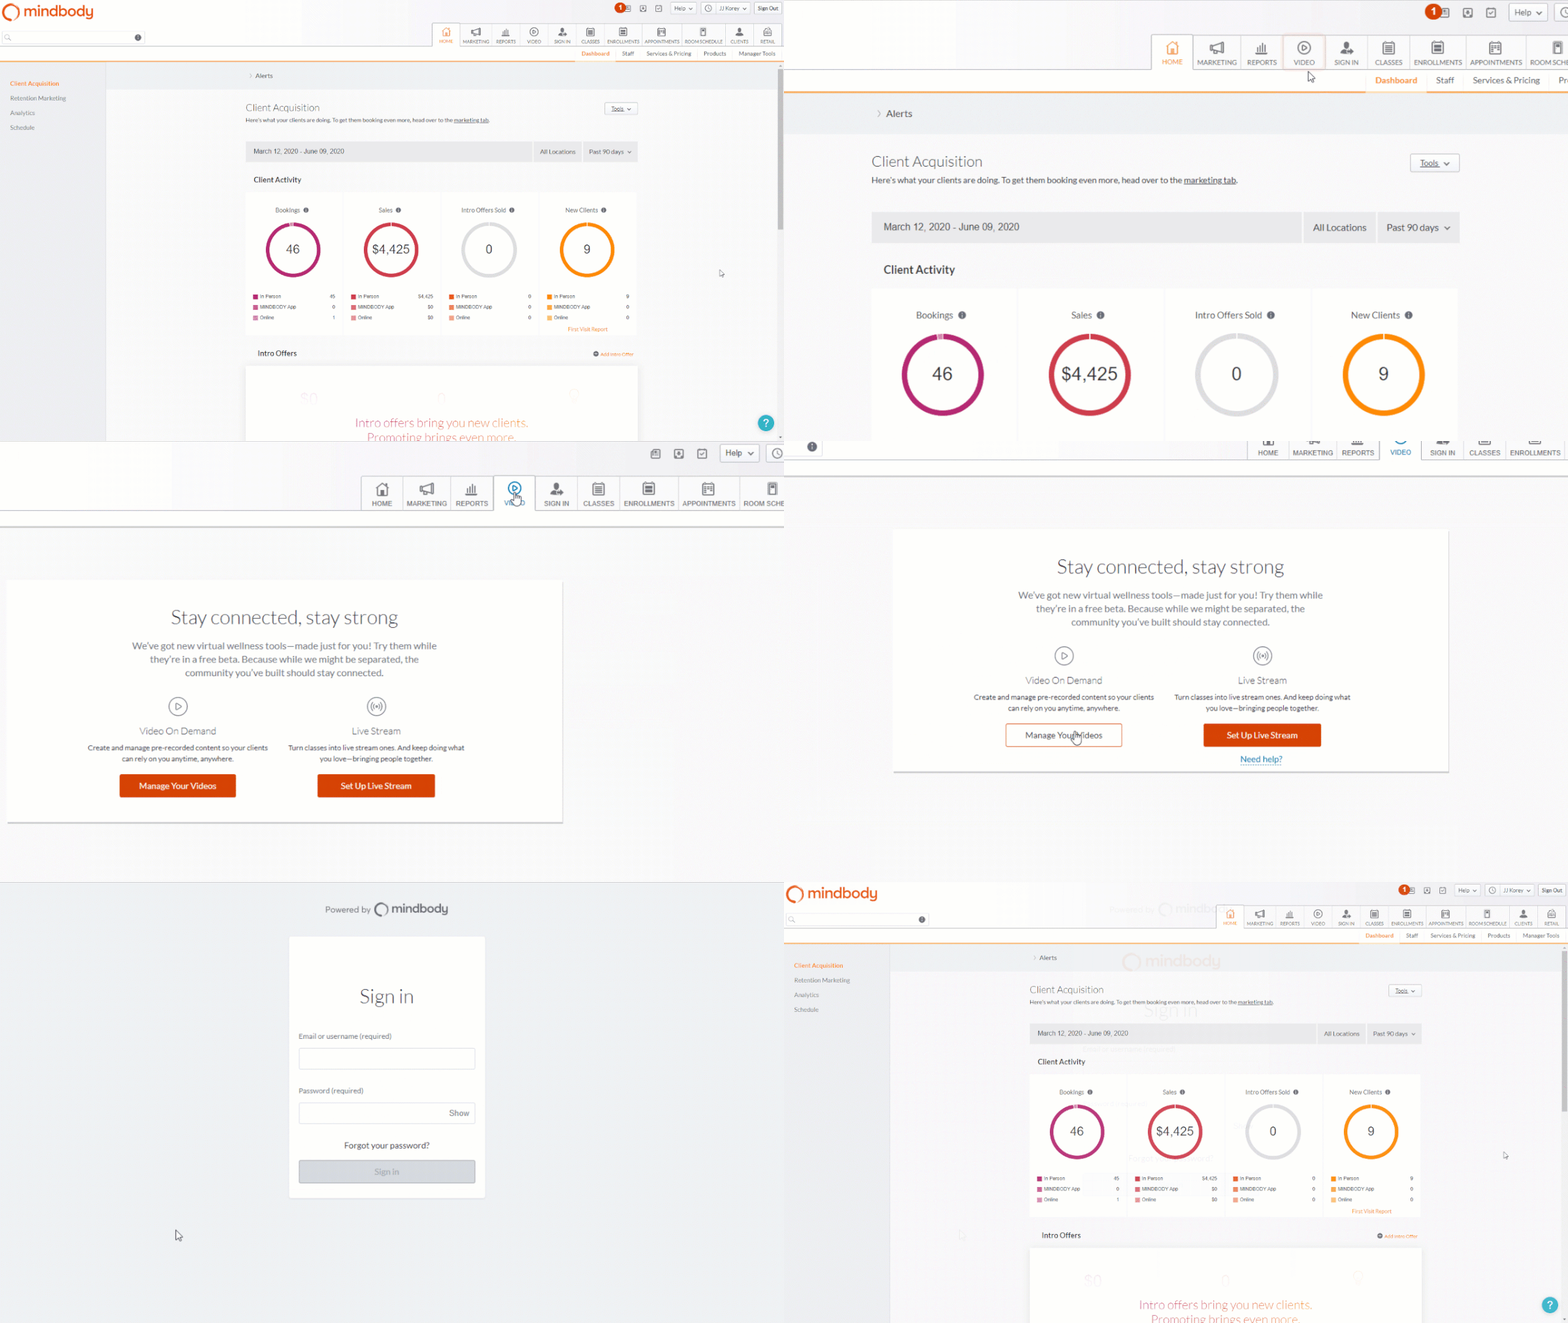
To manage your content, click the Video tab in your site, then click the Manage Your Videos button.
If this is your first time using the Virtual Wellness Platform, you’ll be prompted to log in using the same login credentials as you use for your Mindbody site.
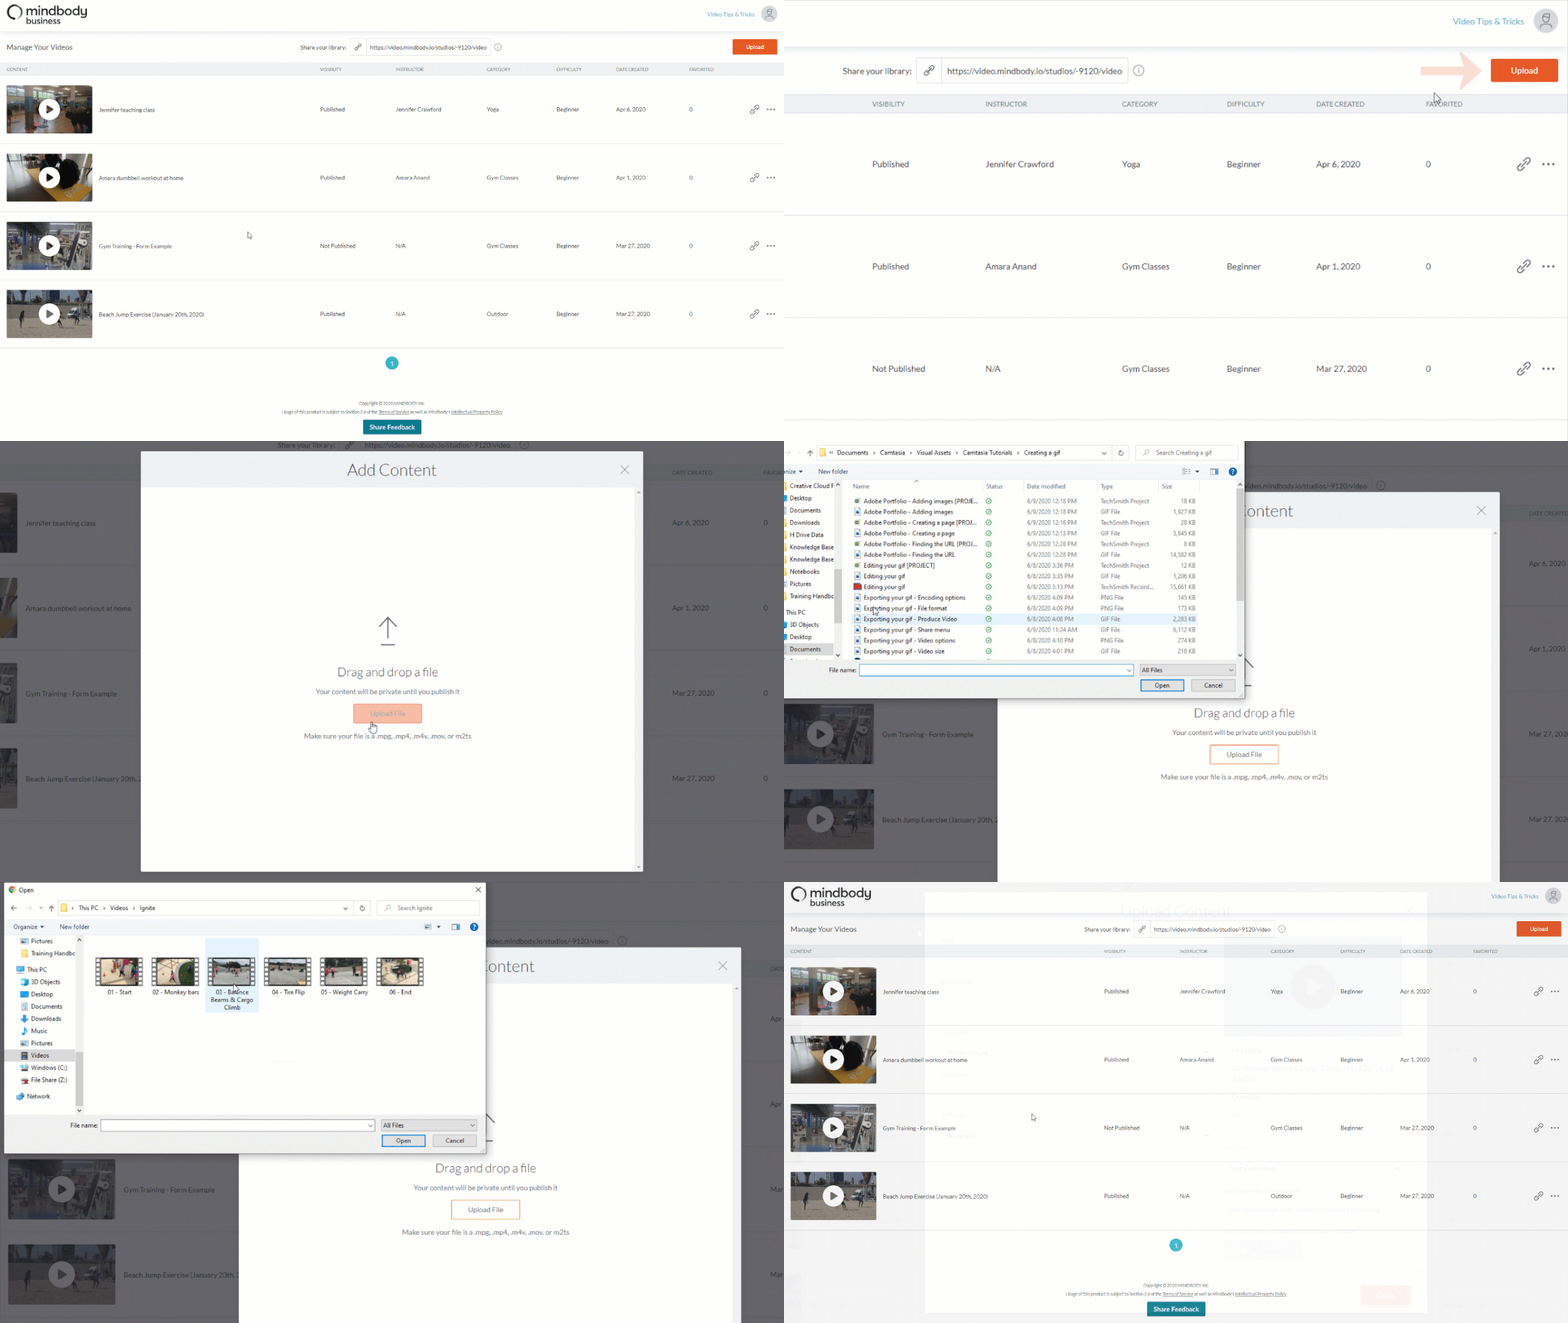
Once logged in, you can add a video by simply clicking the Upload button in the top right corner of the screen. You can either drag and drop your video file into this window or click Upload File to browse for the file in your computer.
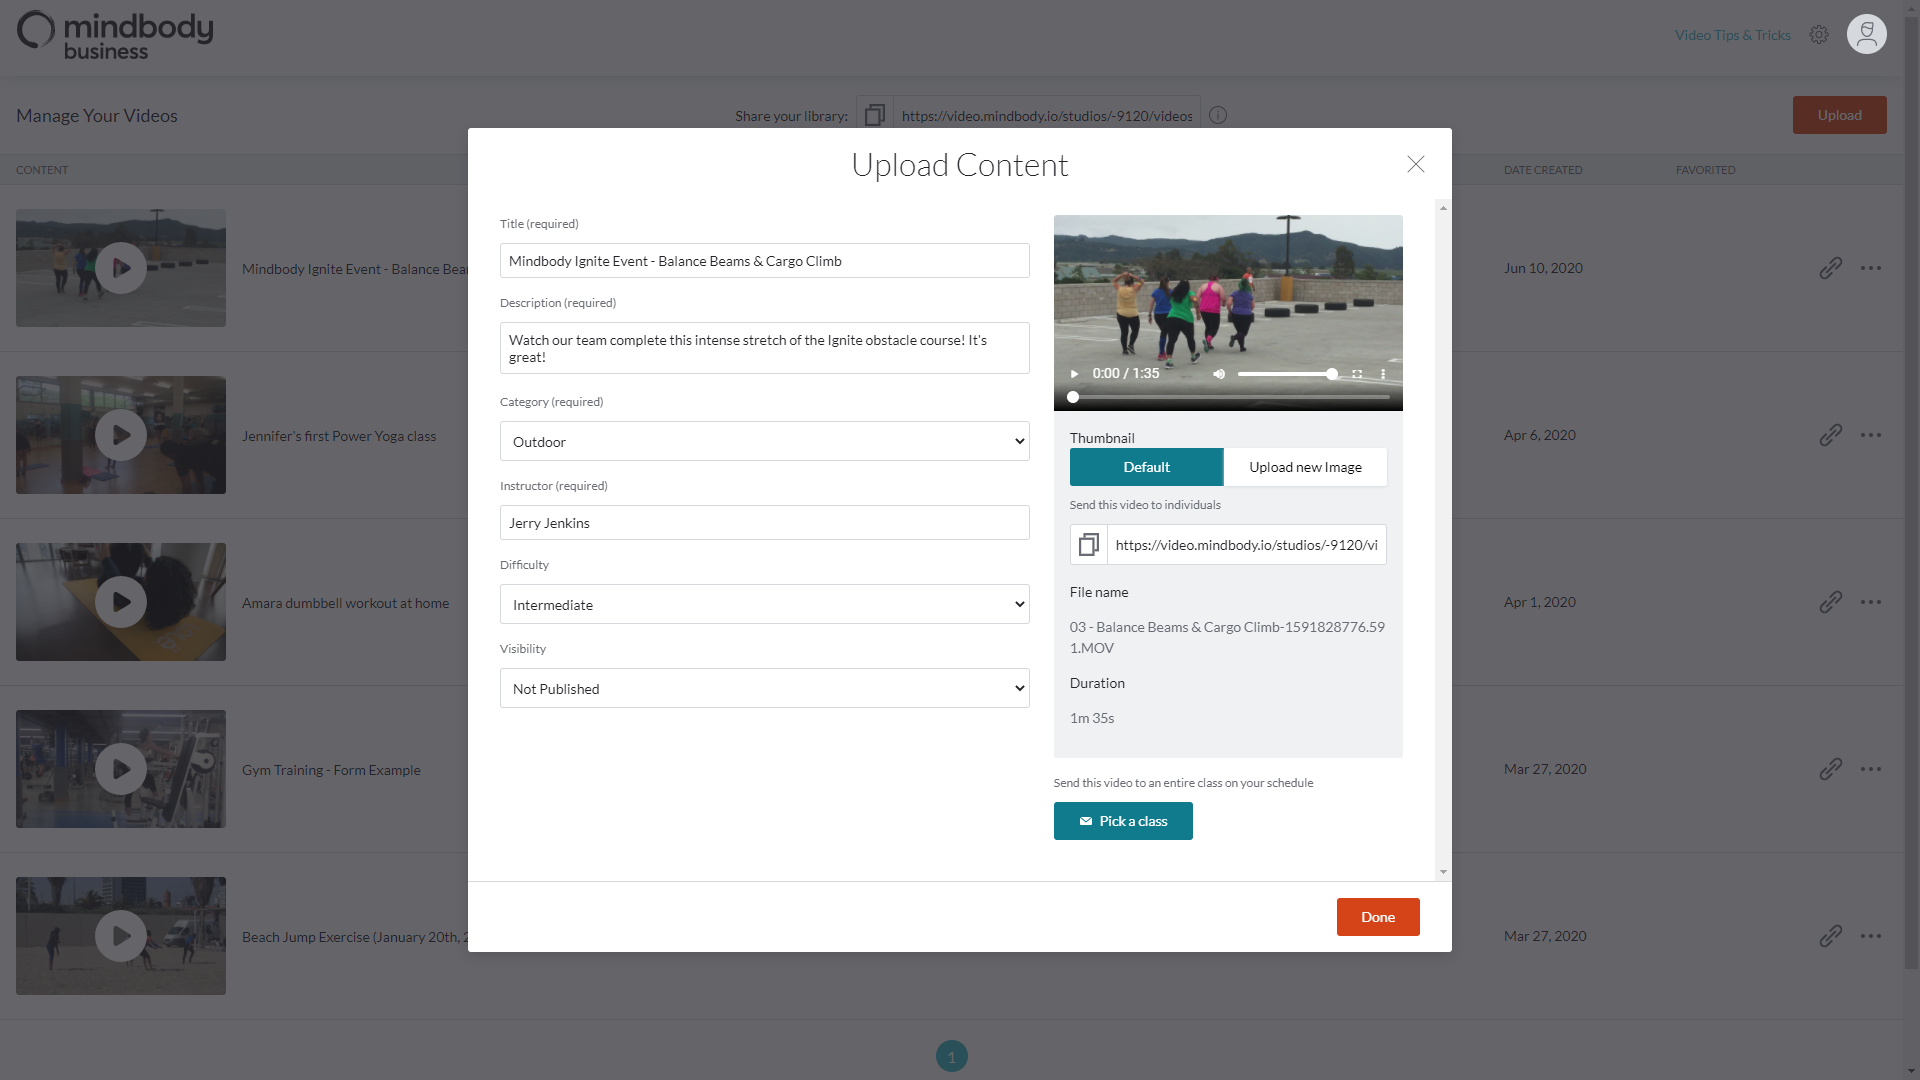
Once your video has been selected, use this screen to fill in the video’s details, like the title, description, and category.
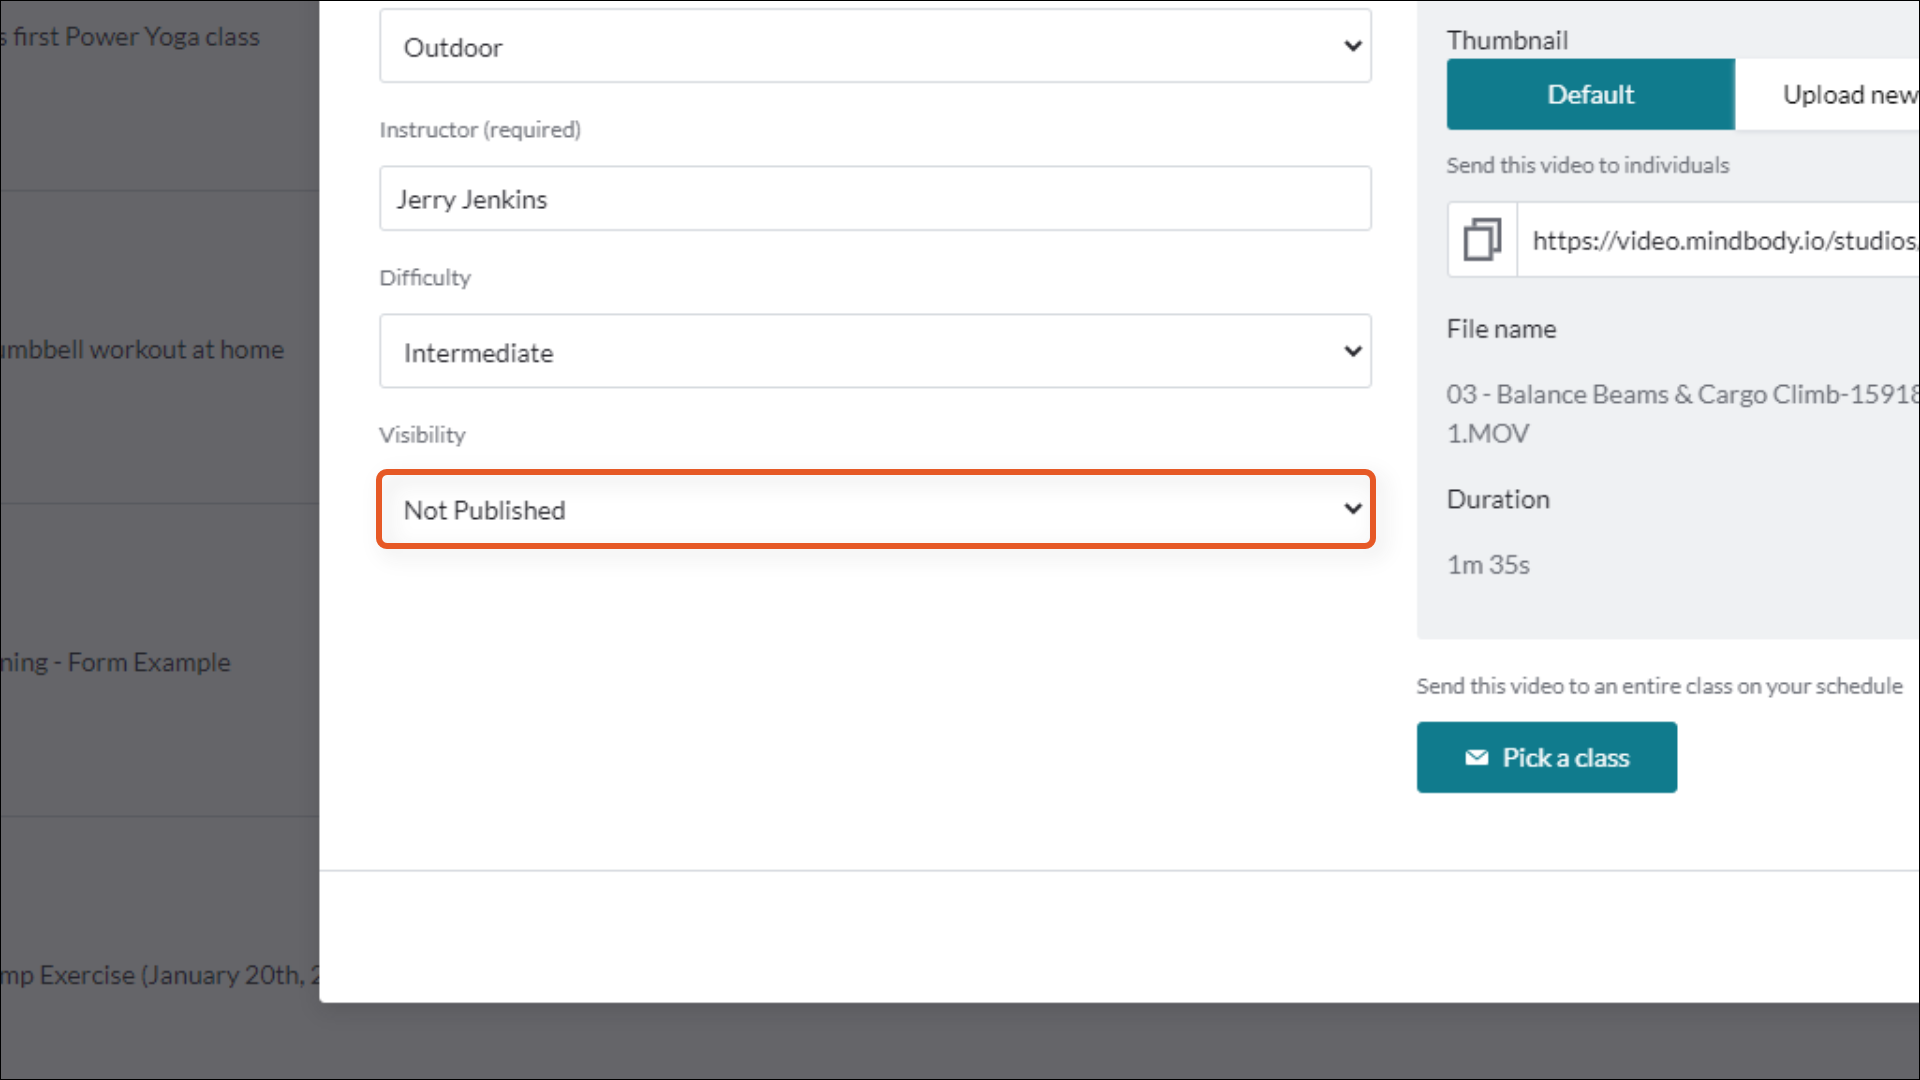
An important step is choosing whether you’d like to keep the video unpublished or set its status to Published.
- Unpublished videos are visible to you in your video library, but will not be accessible to your clients.
- Published videos are available to all clients via your client-facing video library.
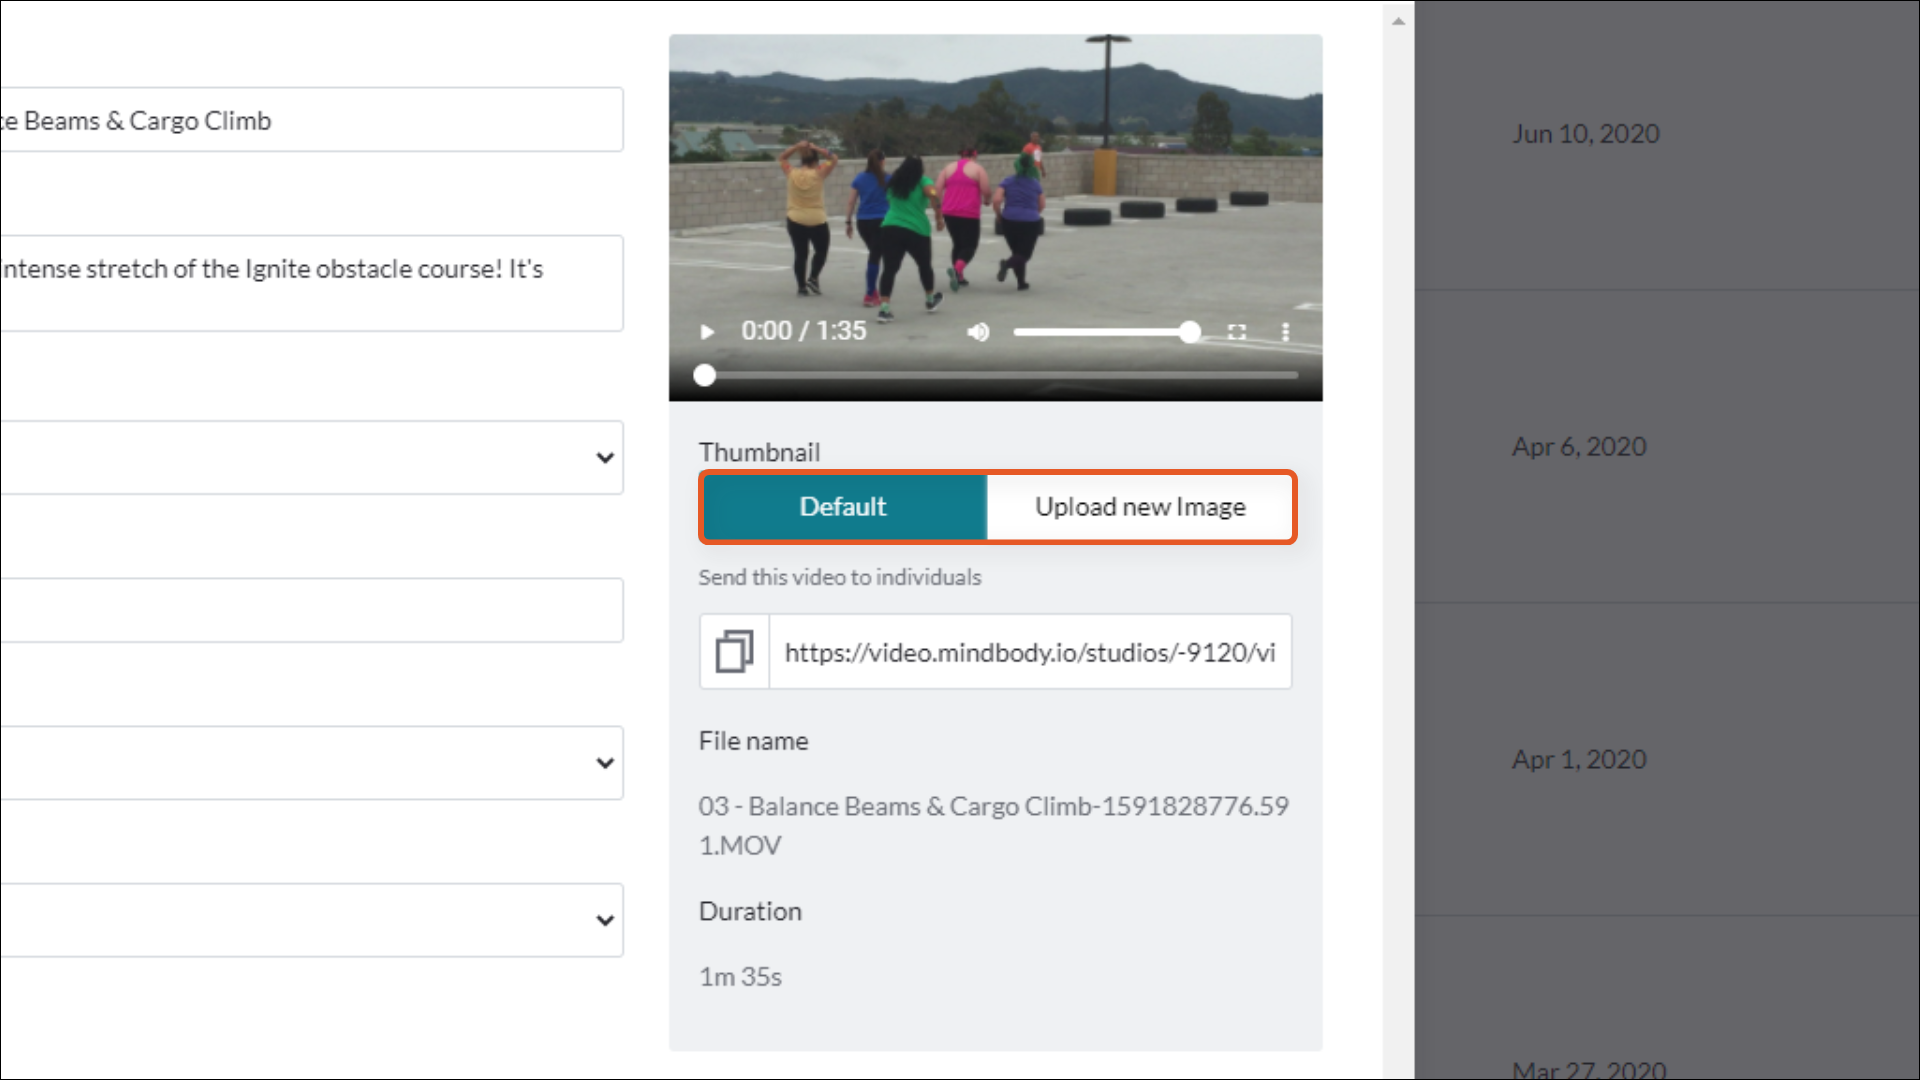
Finally, you can choose whether to use the default video thumbnail or upload custom thumbnail. For more information on supported file types and dimension requirements, please visit our support article on the subject.
When you’re finished, click Done and your video will begin uploading. Depending on the quality and length of your video, it may take some time to upload and process.
Managing your Video On Demand library
Creating custom filters
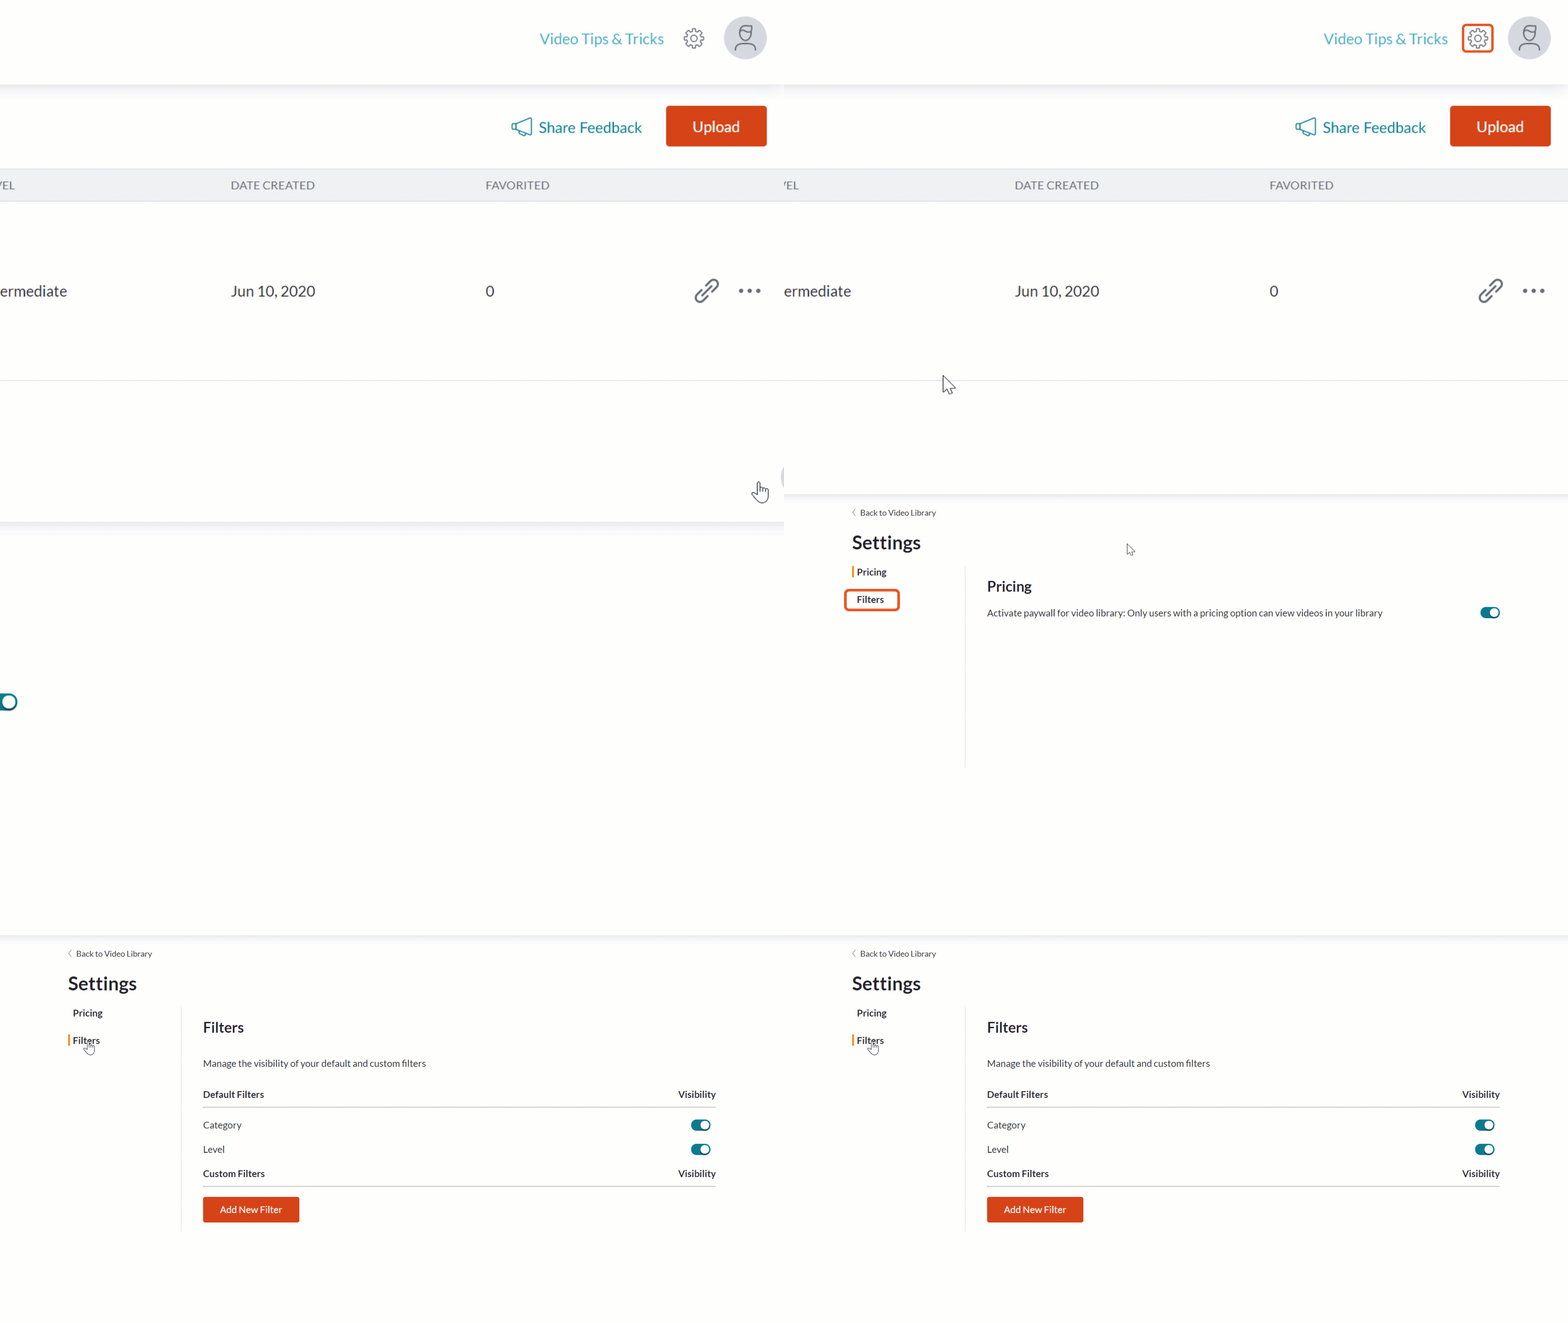
If you'd like to allow your clients to filter the contents of your video library to easily find the content they want, you can do so by creating Custom Filters. Custom filters give you ability to sort your videos into categories tailored for your business.
You can find your custom filters by clicking the gear icon in the upper-right corner of the screen, then clicking the Filters tab.

Here you'll find the Default filters, which we saw when uploading our video before. While the default filters can be enabled or disabled using the toggles on the right, they cannot be edited.
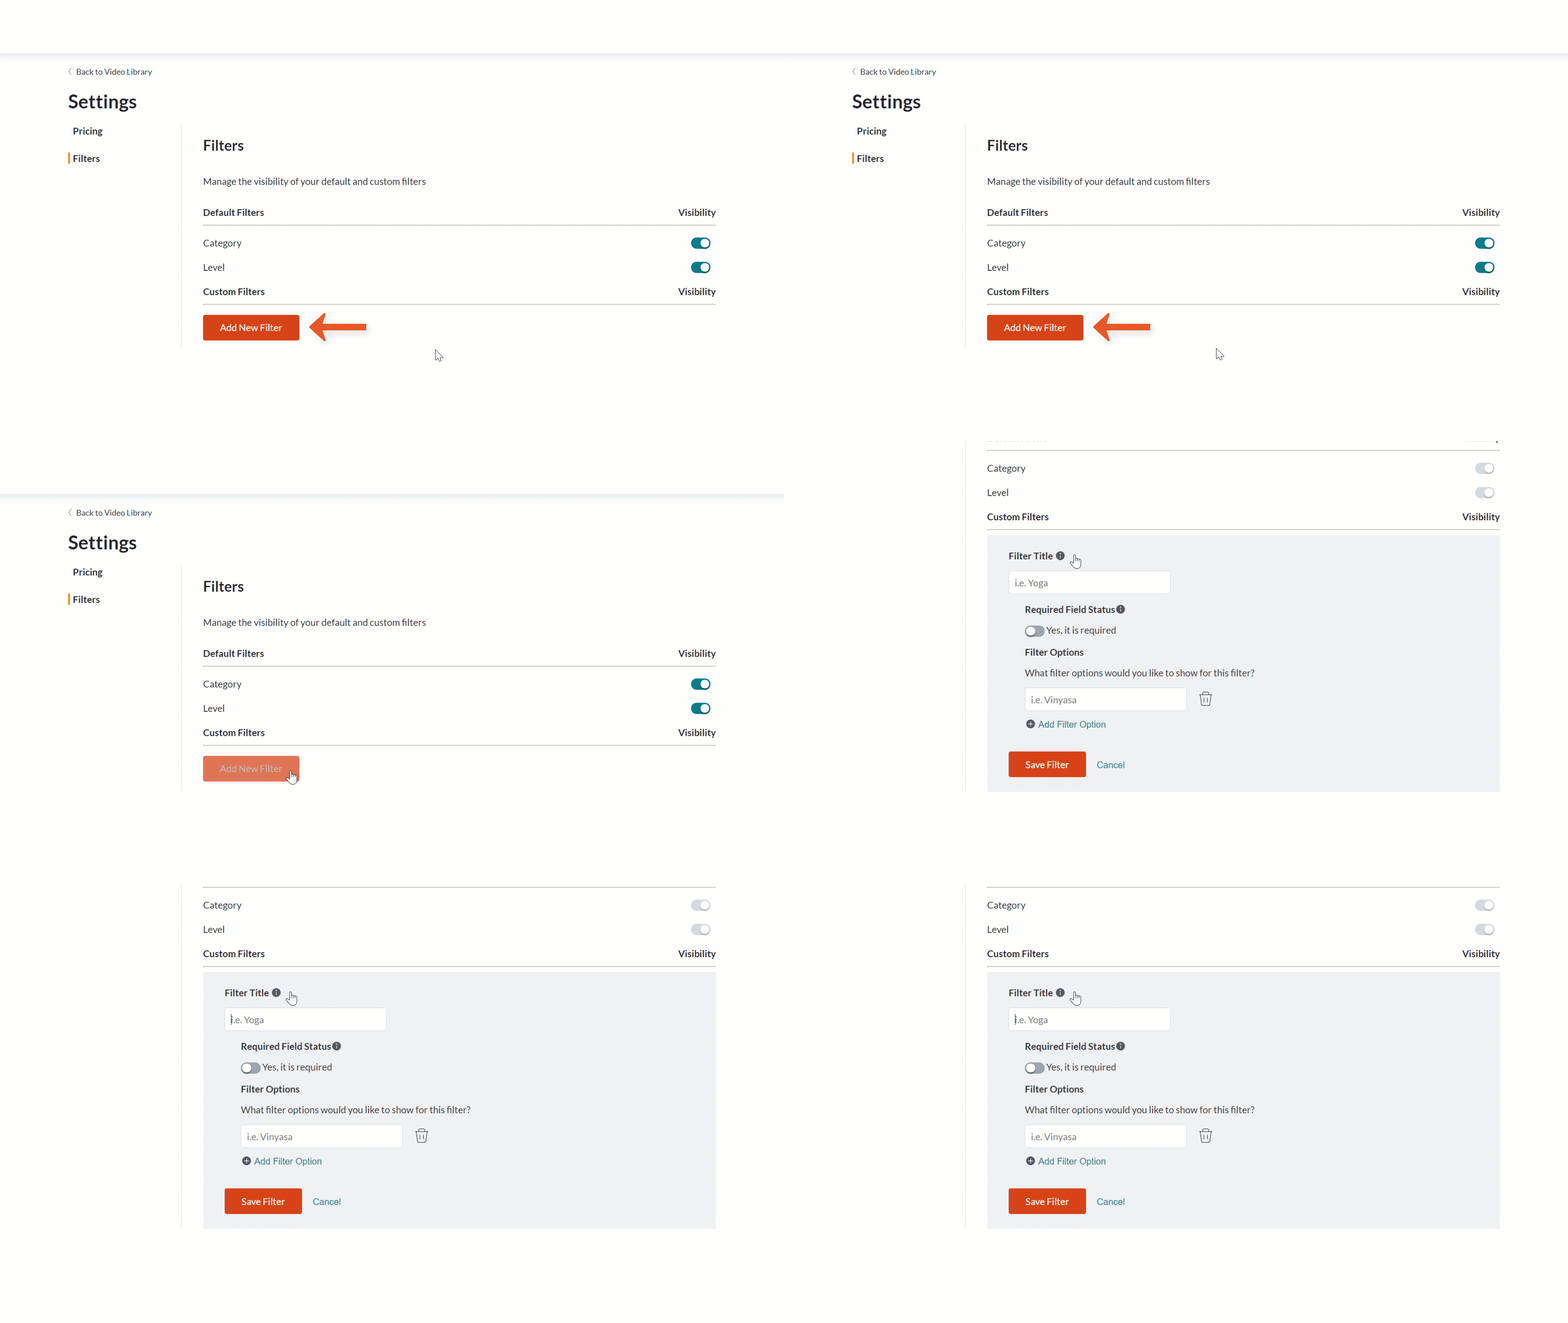
To create a custom filter, click Add New Filter
.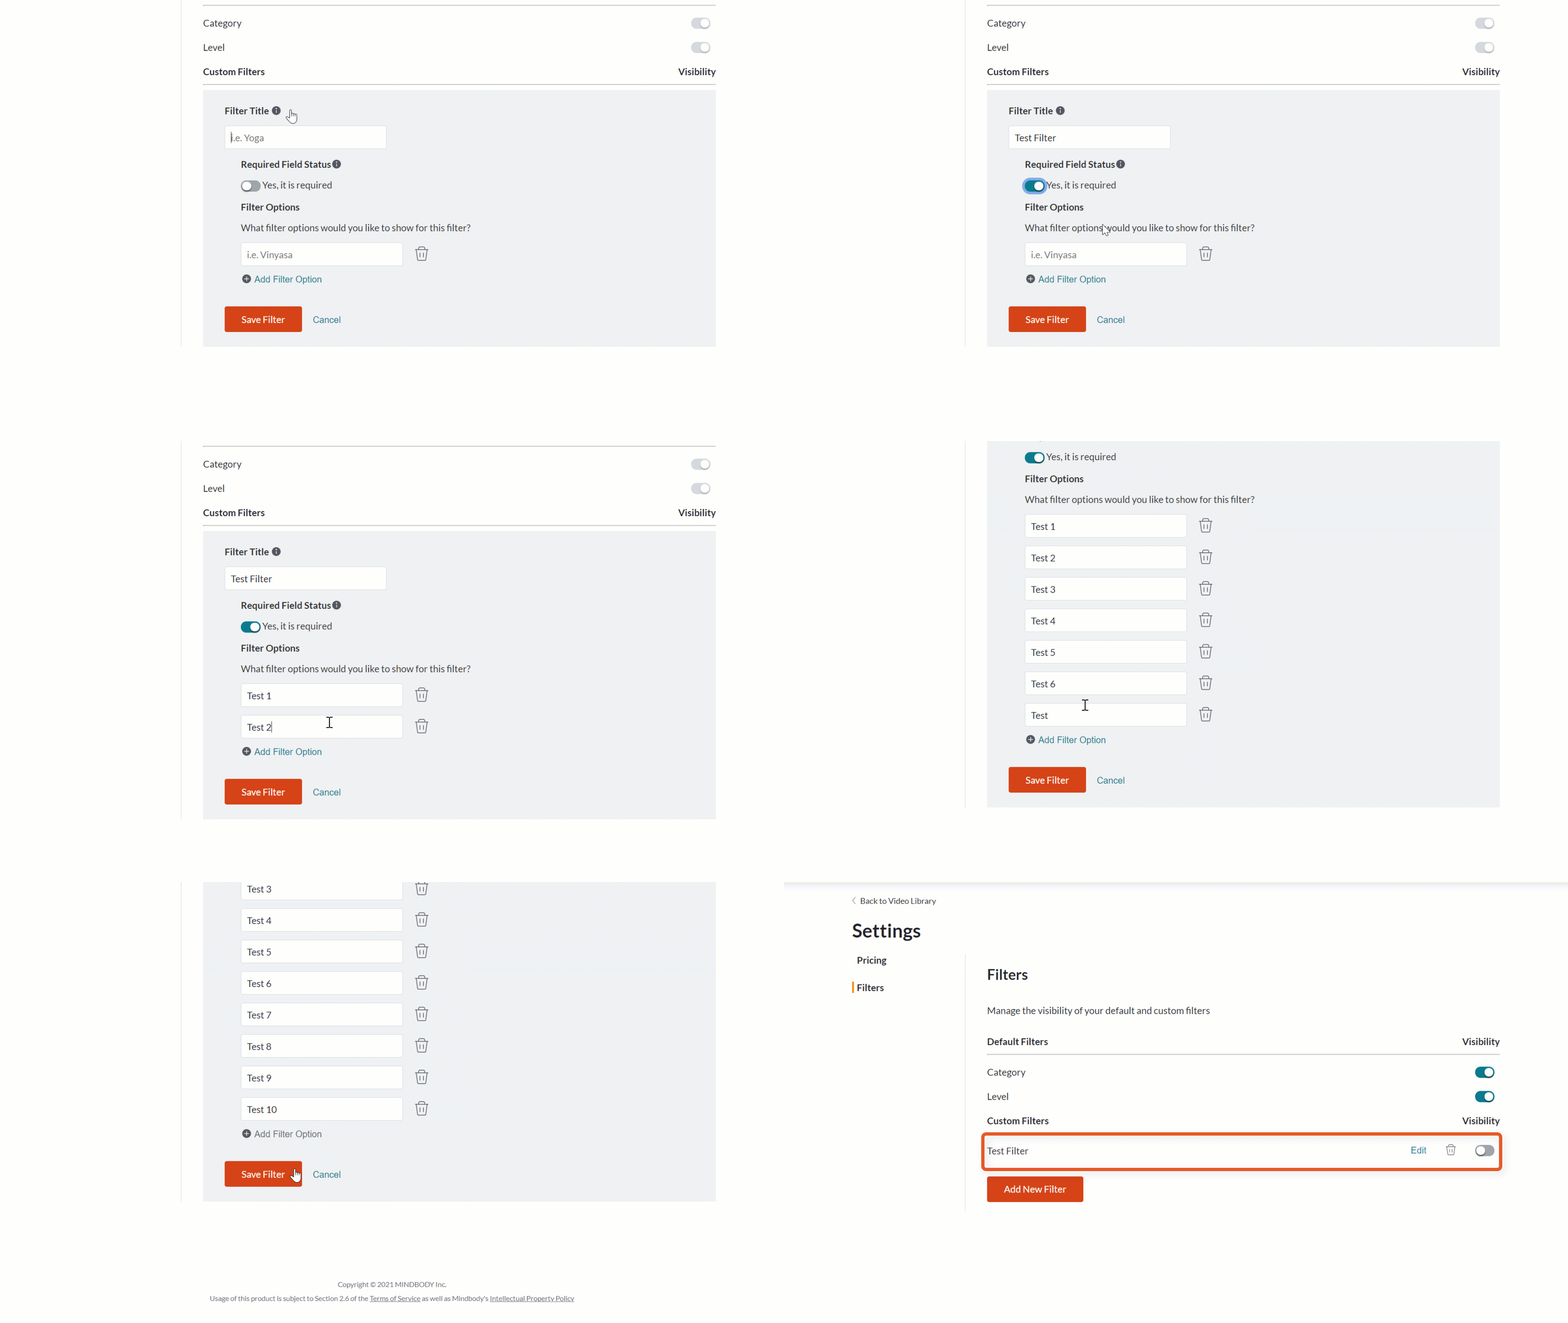
- First, enter the Filter Title. Keep in mind that this title is what your clients will see when filtering videos in your library.
- If you check the Required Field Status option, anyone uploading a new video to your library will be required to select an option for this filter. While this requirement will not apply to already uploaded videos, you can go back and edit your existing videos to use this filter.
- Finally, add which options you would like to be selectable for this filter. You can have up to 10 options per custom filter.
- When you're finished, click Save Filter.
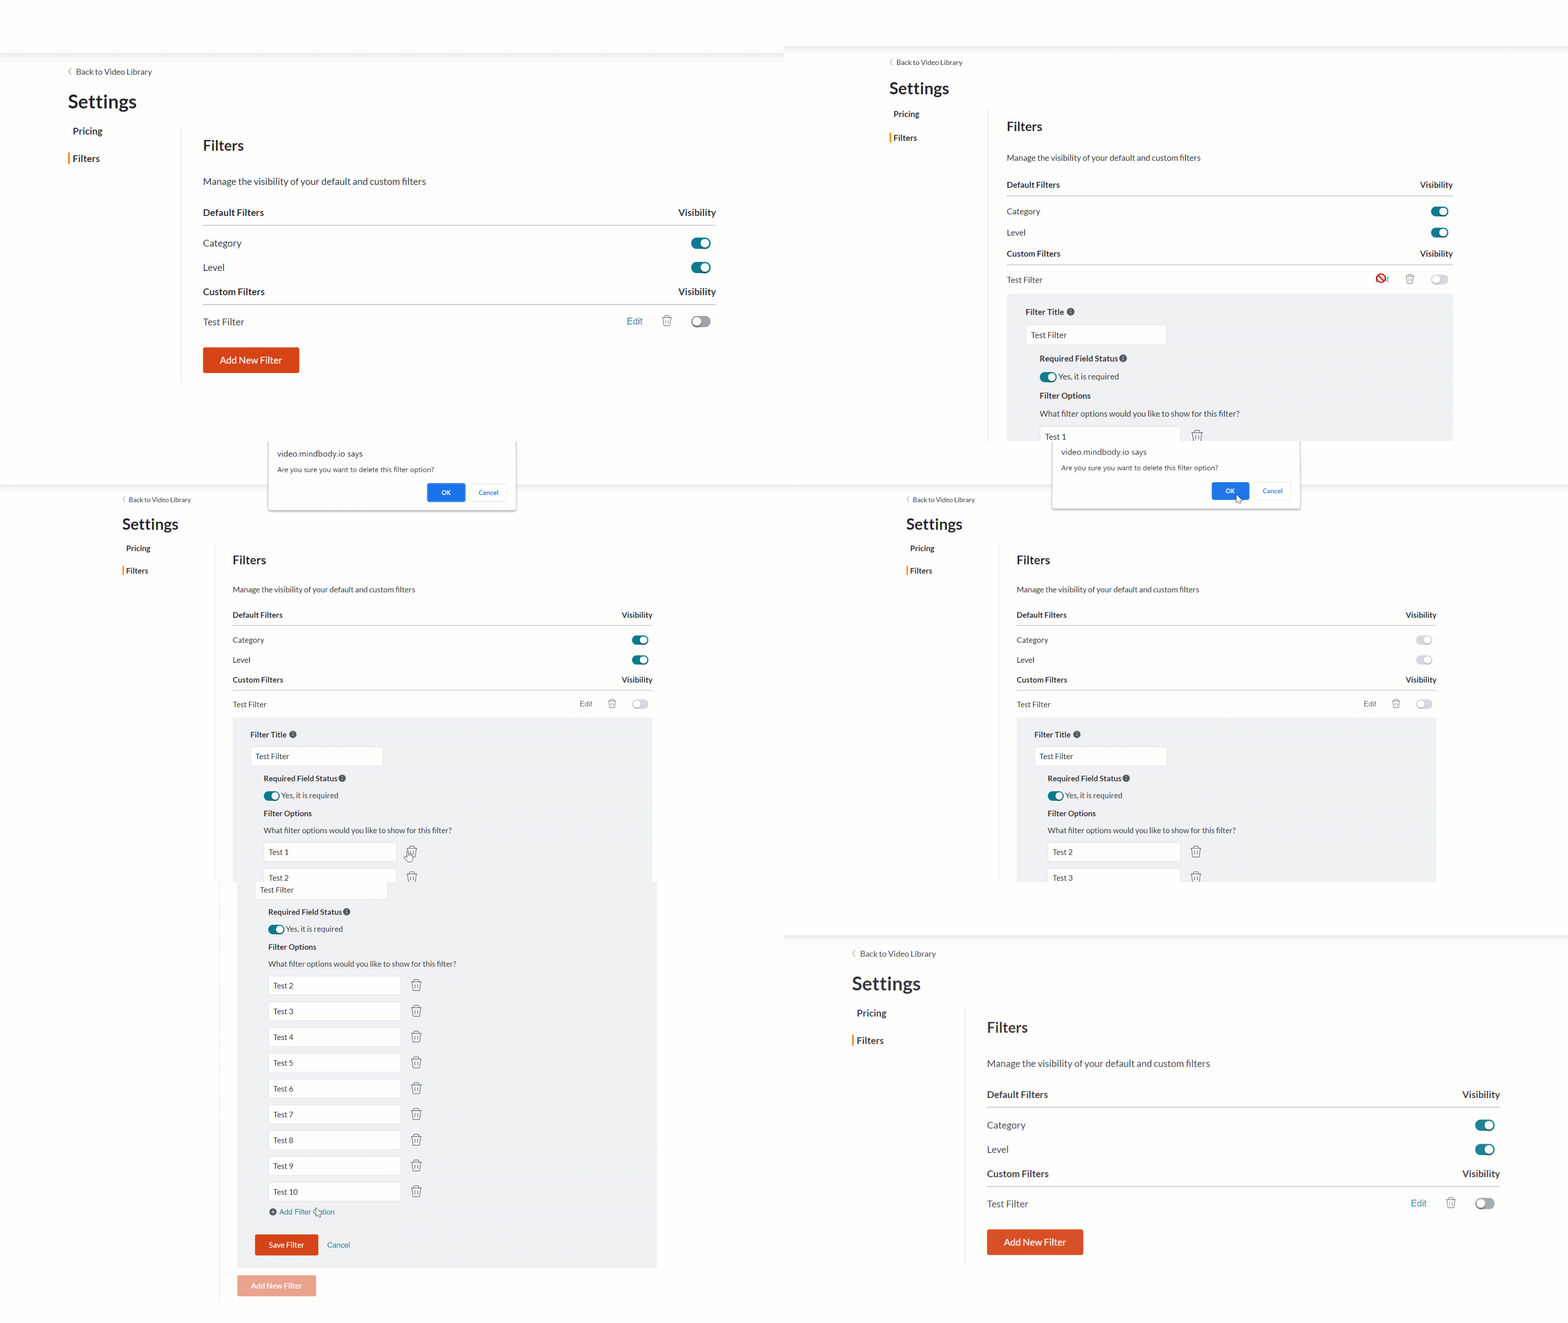
To edit an existing custom filter, simply click Edit on the right-hand side of the filter's listing. This will open the same menu as before, which you can change as needed. To remove an option in the filter, click the trash bin next to that option.
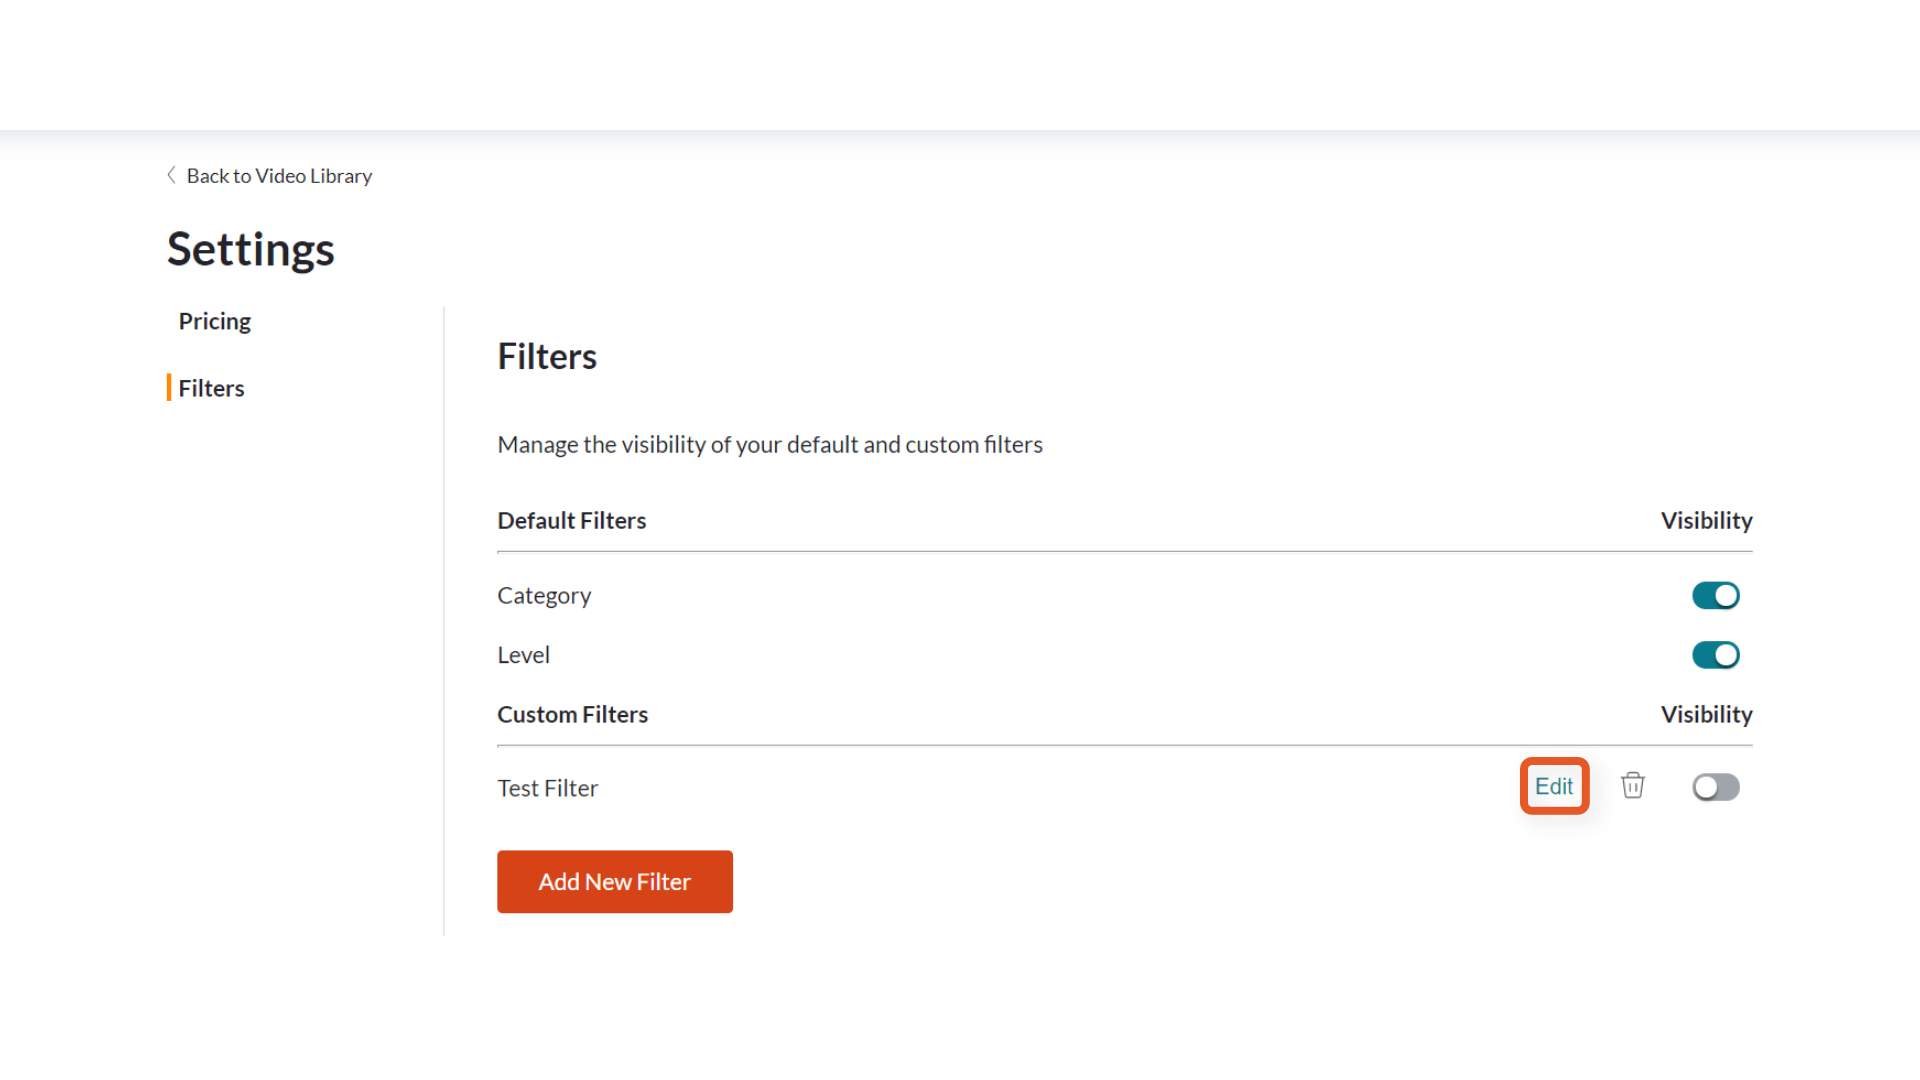
To delete a custom filter, click the trash bin on the right-hand side of that filter's listing.
Editing your video listings
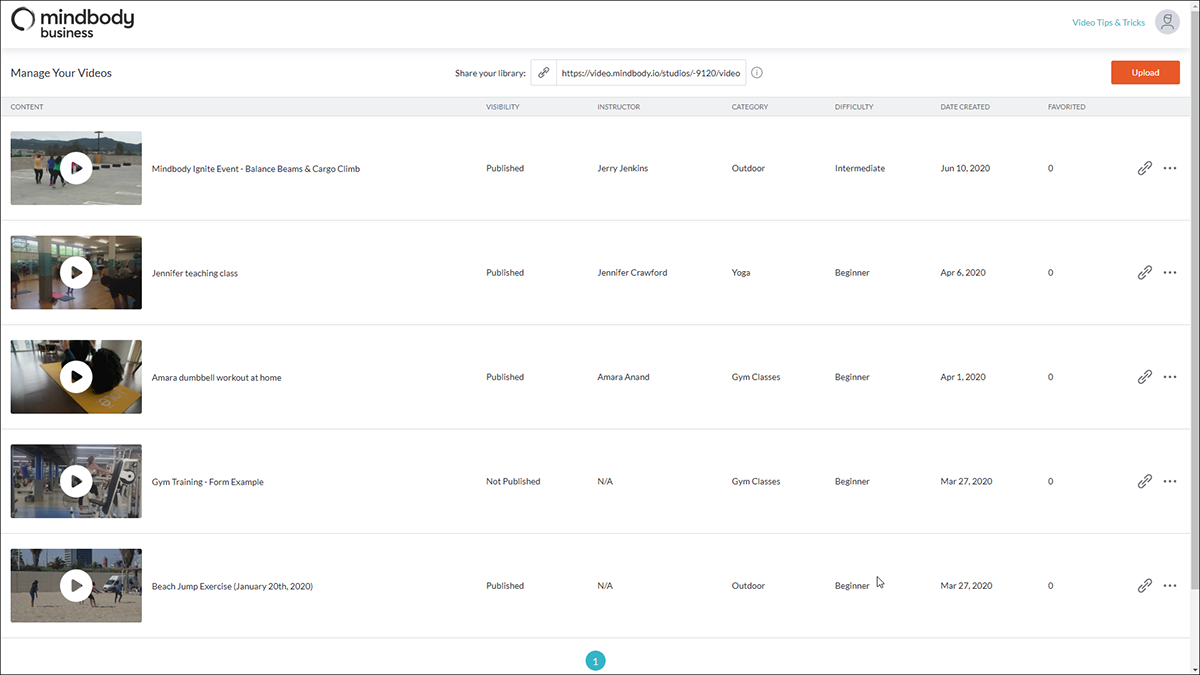
You can use the Virtual Wellness Platform to view, edit, and share your uploaded videos with clients. Any existing videos will be listed here, sorted by the date they were uploaded.
Each video will show much of the information entered during the upload process, including whether it’s published or private.

To edit a video’s information, simply click on that video’s name. This will take you to the same Upload Content window you saw before, where you can edit the details of that video. When you’re finished with your edits, click Done to save your changes.
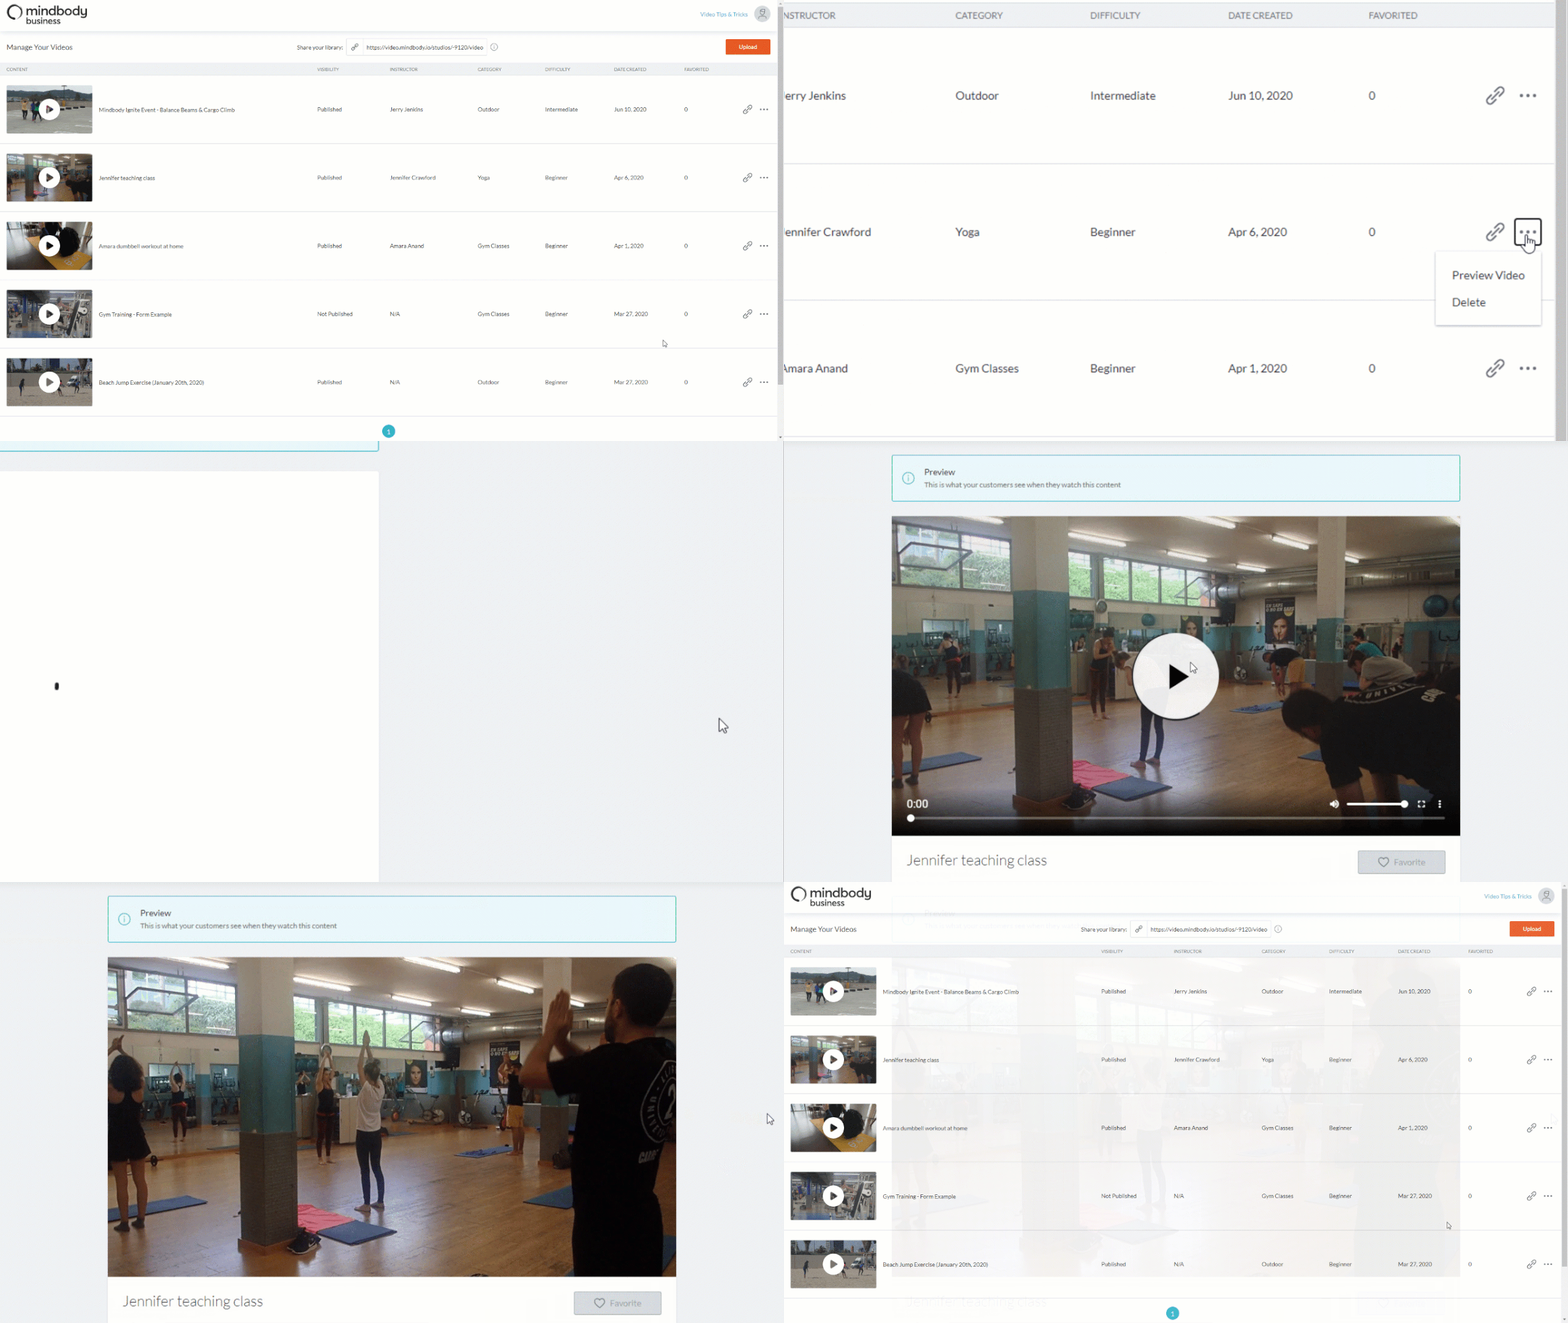
On the right of each video, you’ll see three dots. Clicking this will open a menu where you can preview the video or delete it.
Due to how much fitness-related content is readily available on the internet, client expectations for quality in pre-recorded videos are high. Therefore, you’ll want to be sure that you’re putting your best foot forward and taking care in the creation of your video content.
For more information on how to make high-quality videos for minimal cost, check out these articles from the Mindbody blog.
How to Optimize Audio for Your Videos

Tips for Filming Pre-recorded Workout Videos from an Expert

