Setting up your live stream classes
Outline
Live streaming your services is a new and exciting way to rapidly grow your business outside the walls of your brick and mortar location. It enables current clients to attend your business while abroad, brings new clients into your community from nearly anywhere in the world, and gives your staff the flexibility to work remotely when necessary.
Here, we'll be walking you through creating a new virtual service category, classes, and pricing options. This is what we recommend as a best practice, even if the virtual services will take place at the same time as your regular class. The method we go over here will allow you greater control over class rosters, attendance, and reporting.
Important note: Apple and Google continue to change the rules regarding how virtual services exist on their platforms. This affects the virtual services you offer to your customers on the Mindbody app for iOS and Android. See our Apple and Google Play In-app Purchases (IAP) FAQ article to stay up-to-date on these changes.
Step 1: Create a virtual service category
Creating and scheduling live streamed services follows a similar process to any other service type, with a couple of additional steps.
1. From the Home tab, select Services & Pricing.
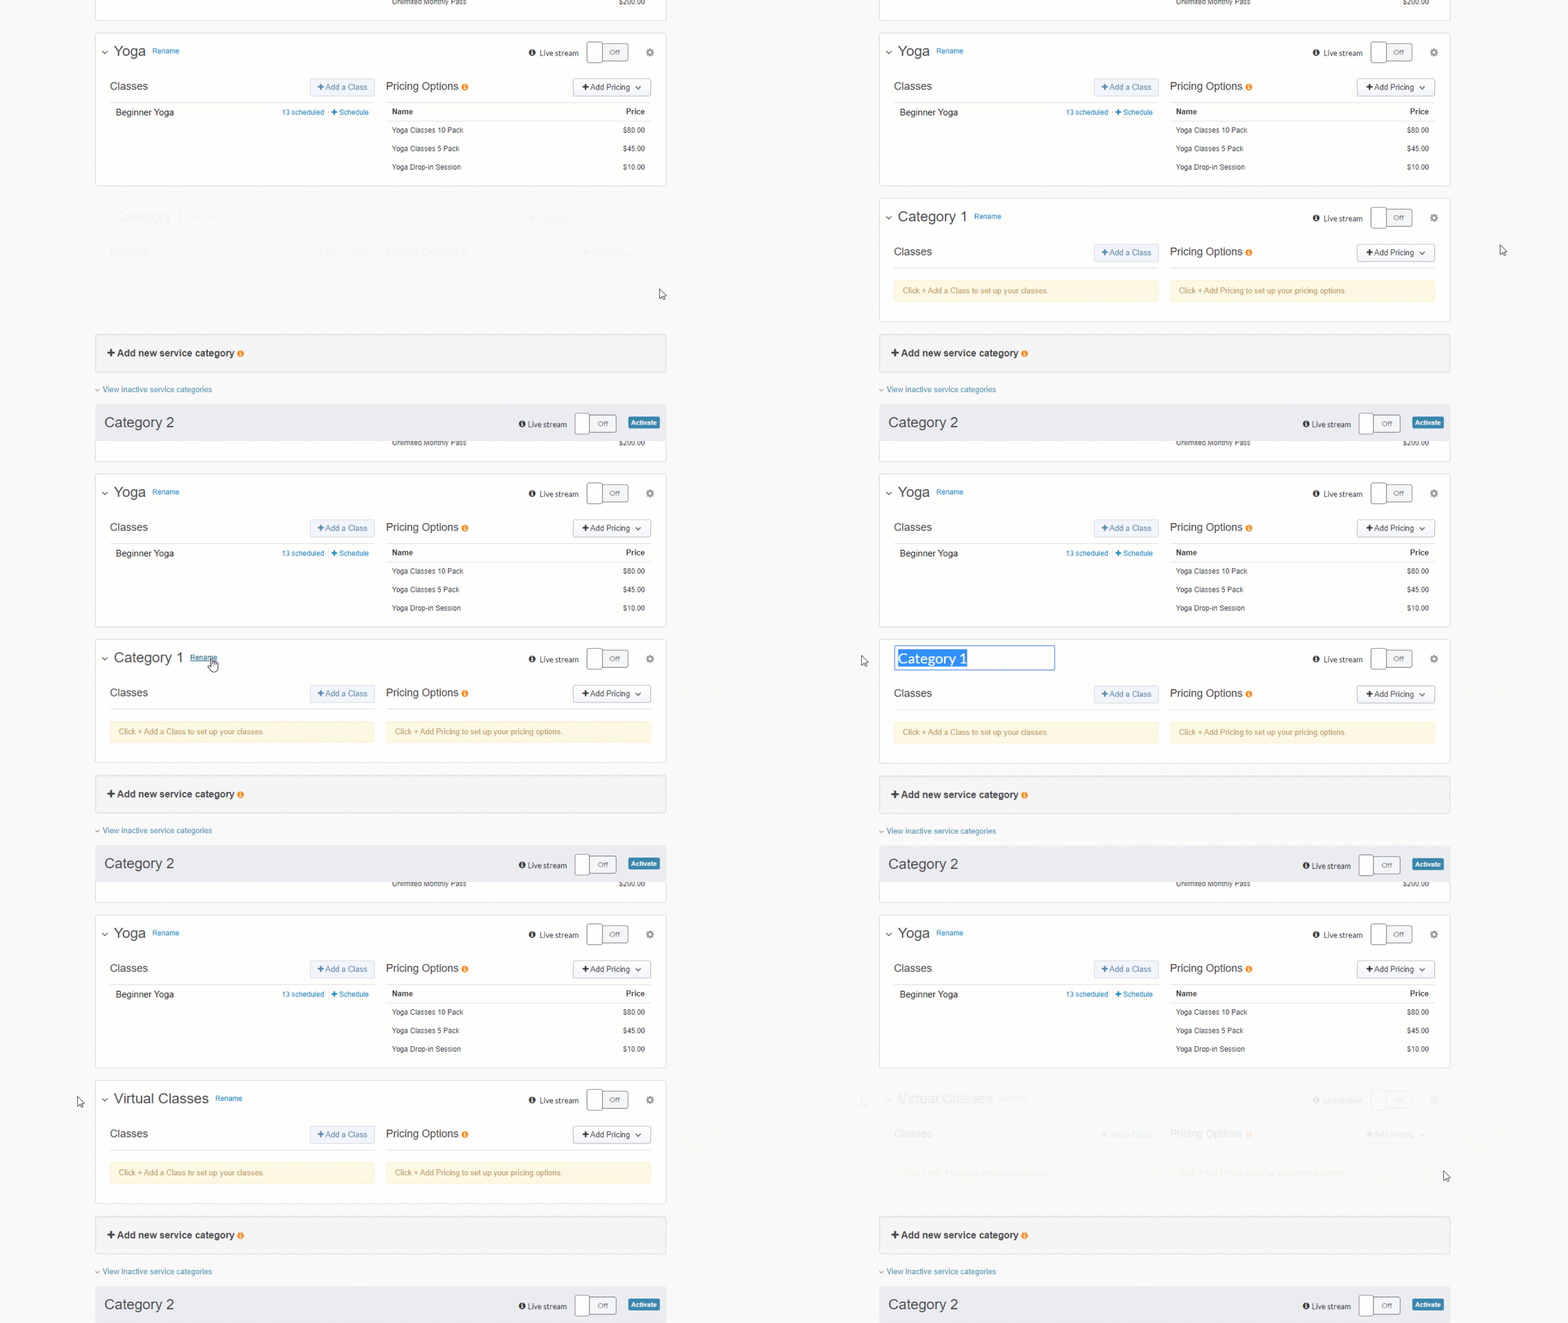
2. Next, click +Add new service category at the bottom.
3. Select the Continue with Classes button when the pop-up appears and then rename the service category.
Make sure you're renaming your service category to include "Virtual". For example, if this is for "Yoga", simply call the new service category "Virtual Yoga".
Step 2: Create new virtual classes
Just like with the service category, adding virtual classes is very similar to adding regular classes.
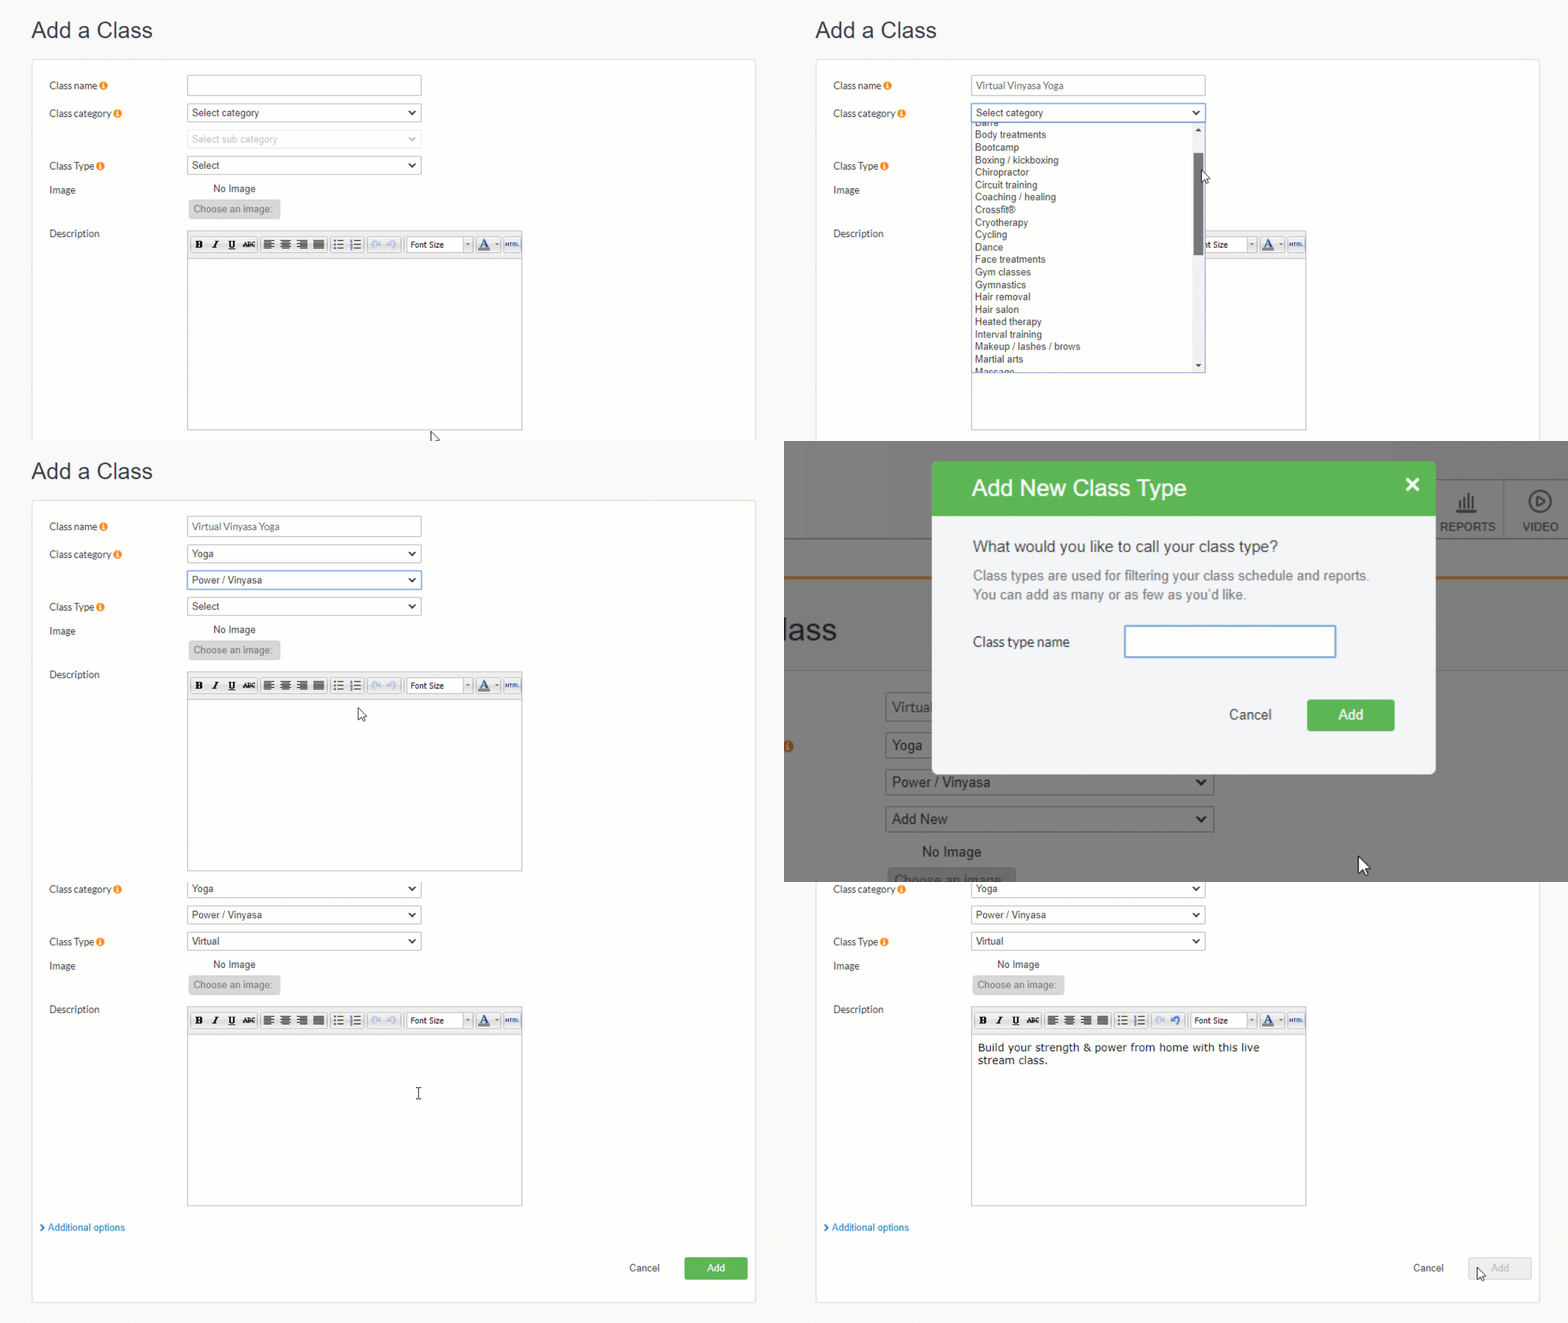
1. Click the +Add a Class button to create your virtual class.

2. Add the term Virtual to your class name. This will allow your classes to appear when clients search for live stream classes on Mindbody.io and in the Mindbody app.
3. In the Class Type drop-down, choose +Add new and create a Virtual category. This will allow you to run separate reports between your in-person classes and virtual classes.
Step 3: Schedule your virtual classes
The steps for scheduling your virtual classes are the same whether they're standalone or hybrid classes.
1. Click +Schedule next to your newly created virtual class to add the schedule.

2. If you’re offering an in-person class that is also being live streamed (referred to as a hybrid class), you’ll need to schedule the live stream sessions for the same dates and times as the in-person ones. This allows your students to sign up for the in-person class or the virtual class. If these are new virtual-only classes, just add in your new date and time for when the class takes place.
The staff member assigned to the class will automatically become the host of the live stream when they join. However, any staff member or owner can start and join the live stream -- regardless of which staff member was originally assigned.
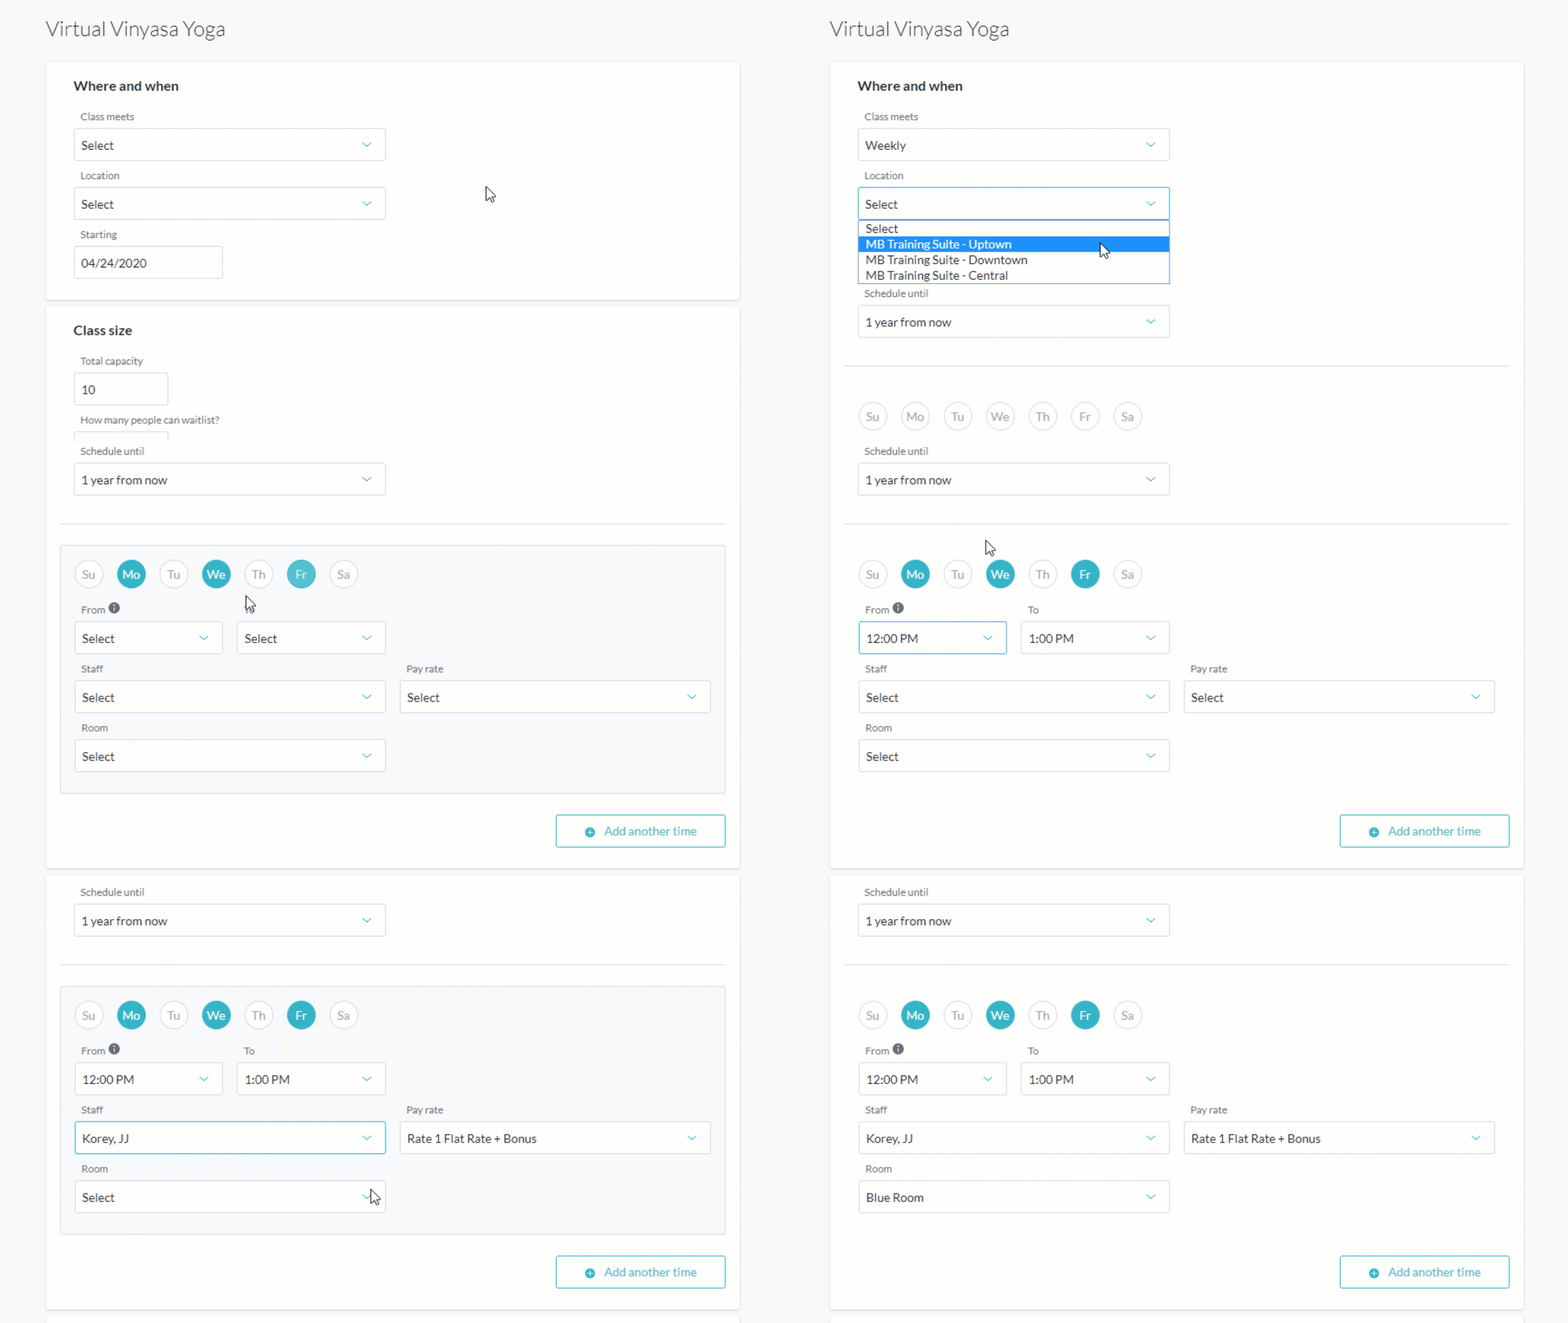
Live stream classes have a maximum capacity of 250 participants, so feel free to set this to however many clients you feel comfortable teaching at once. Since this is a separate class schedule for live stream, your in-person class capacity remains the same.
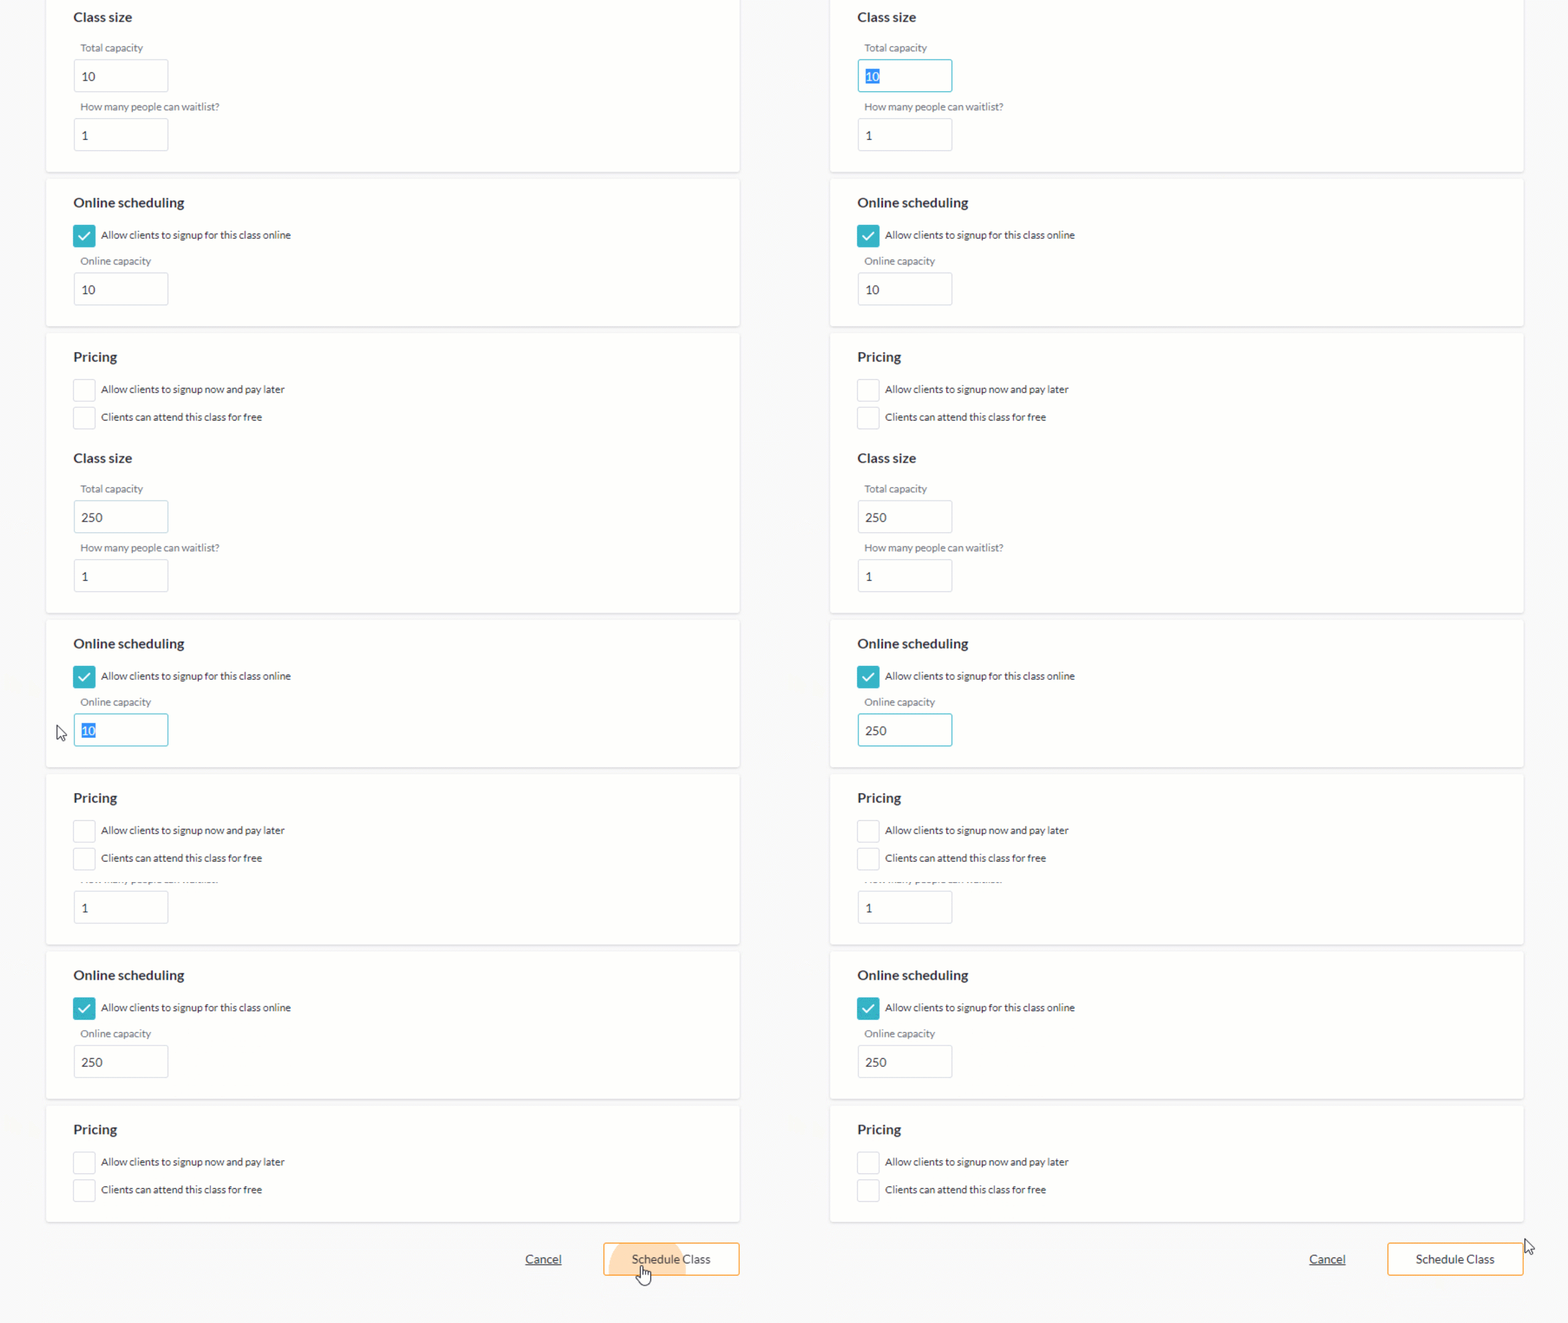
Once the class is created, go ahead and schedule as many sessions as you need. When scheduling, keep in mind that live streamed classes cannot be longer than 24 hours. A good length for a live stream class is typically between 45 minutes and an hour.
Step 4: Create your virtual pricing options
Next, you can either create new pricing options for these virtual classes, or create a pricing relationship with another service category. Using both methods can also be a great option, like if you want to implement a discounted “virtual only” pricing option, while still giving existing clients the option to book classes virtually or in person.
Option 1: Create a pricing relationship.
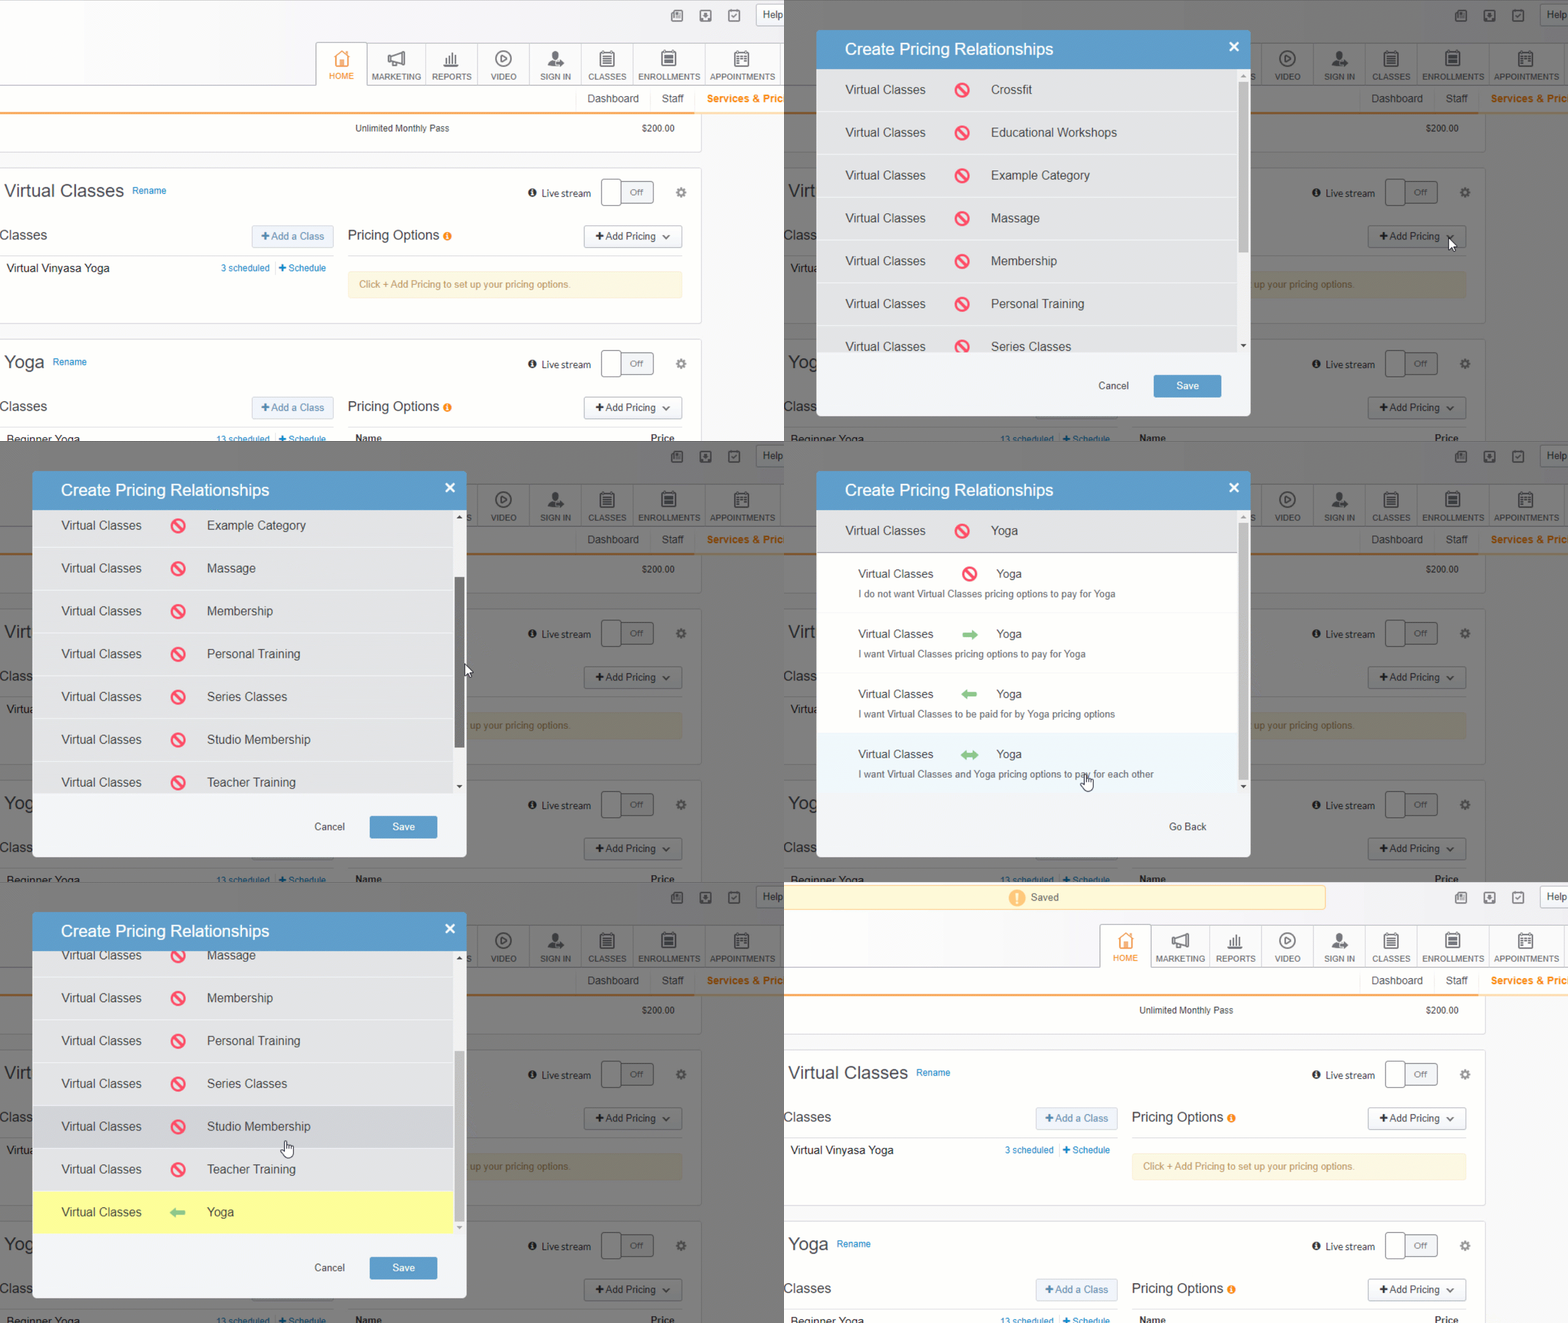
1. Click the gear icon on the far right of the new virtual service category and choose Create pricing relationship.
2. Click on the service category of the in-person classes. Then choose the option to allow the in-person classes to pay for the virtual classes. For example, I want Virtual Yoga to be paid for by Yoga pricing options.
Option 2: Create new virtual-only pricing.
1. Click the +Add Pricing button and follow the same steps you normally would for creating a pricing option.
Step 5: Turn on the live stream
The final step is to enable the live stream capabilities.
1. There is a Live stream switch in the upper-right corner of each Service Category. Clicking this switch to On will make all classes within that Service Category available to live stream.
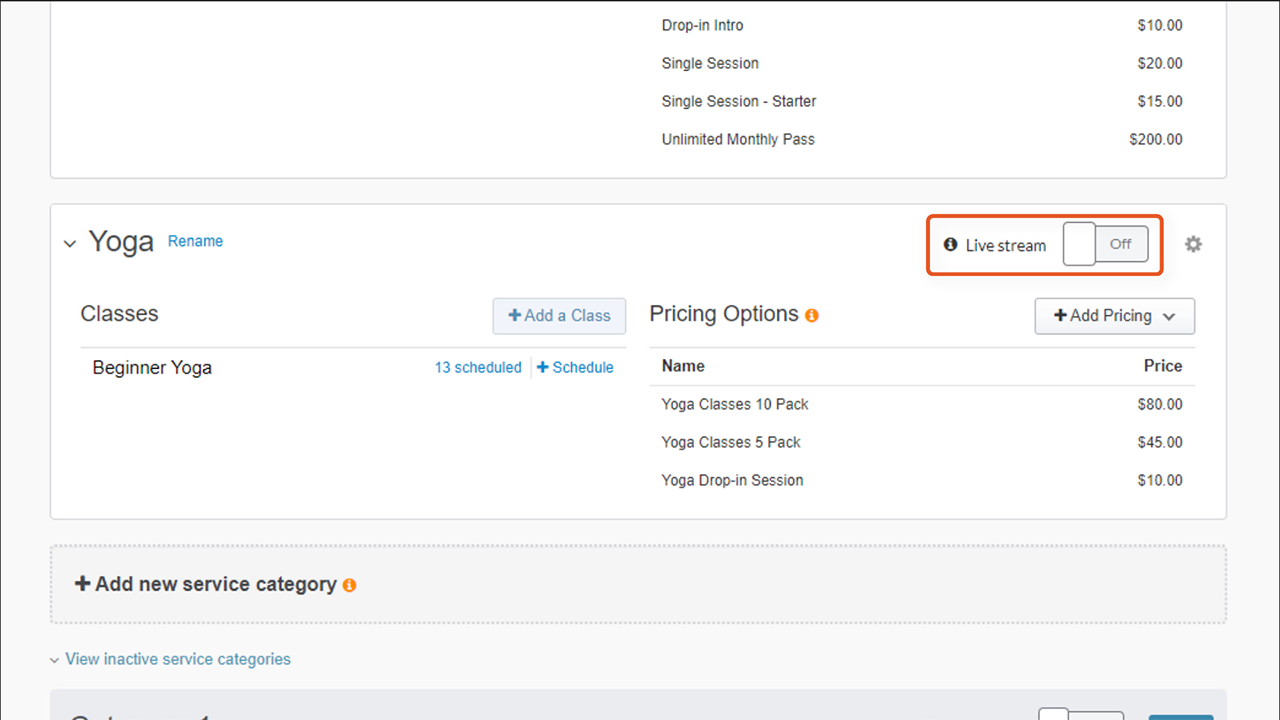
There’s no limit to the number of live stream classes you can have scheduled or the number of live stream classes you can have running at once.
Locating live stream classes
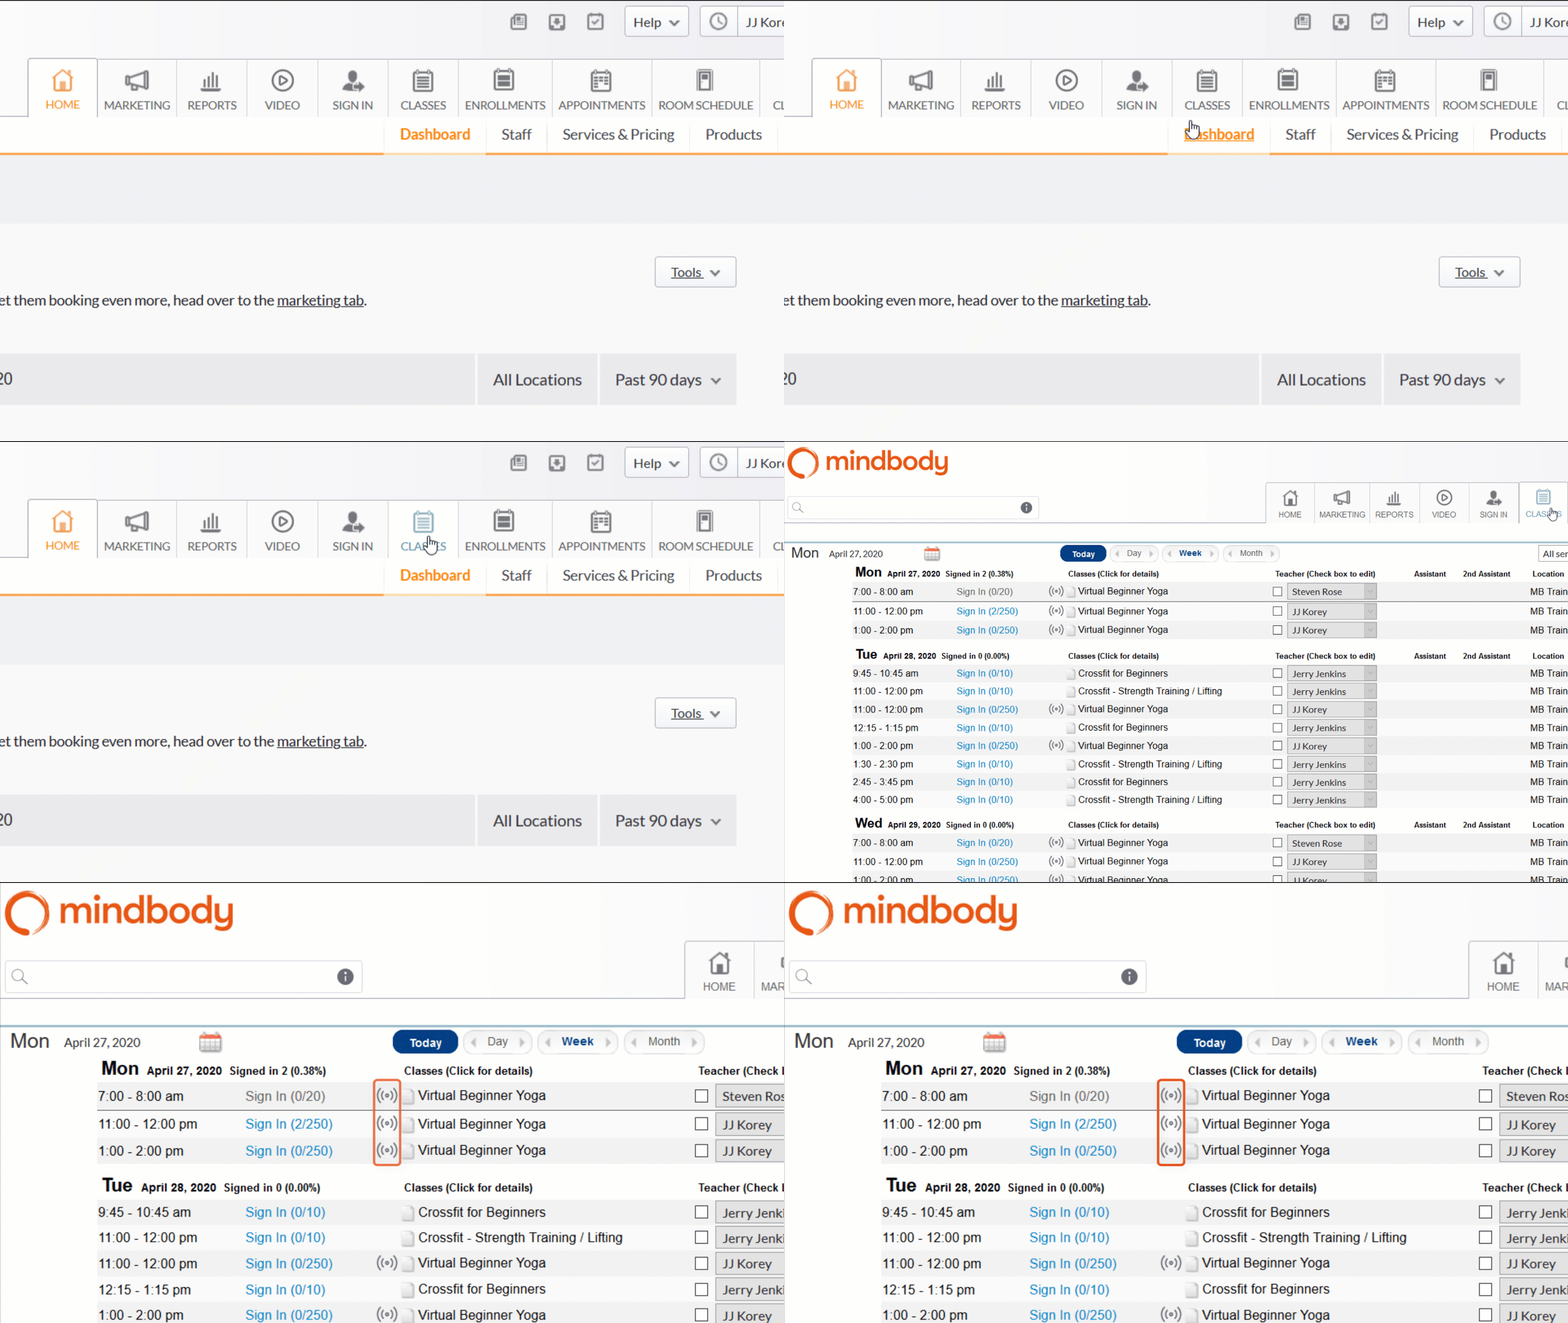
1. Click the Classes tab at the top to open your class schedule. In the schedule, you’ll see every class with live streaming enabled, indicated with a signal icon by the class’ name.
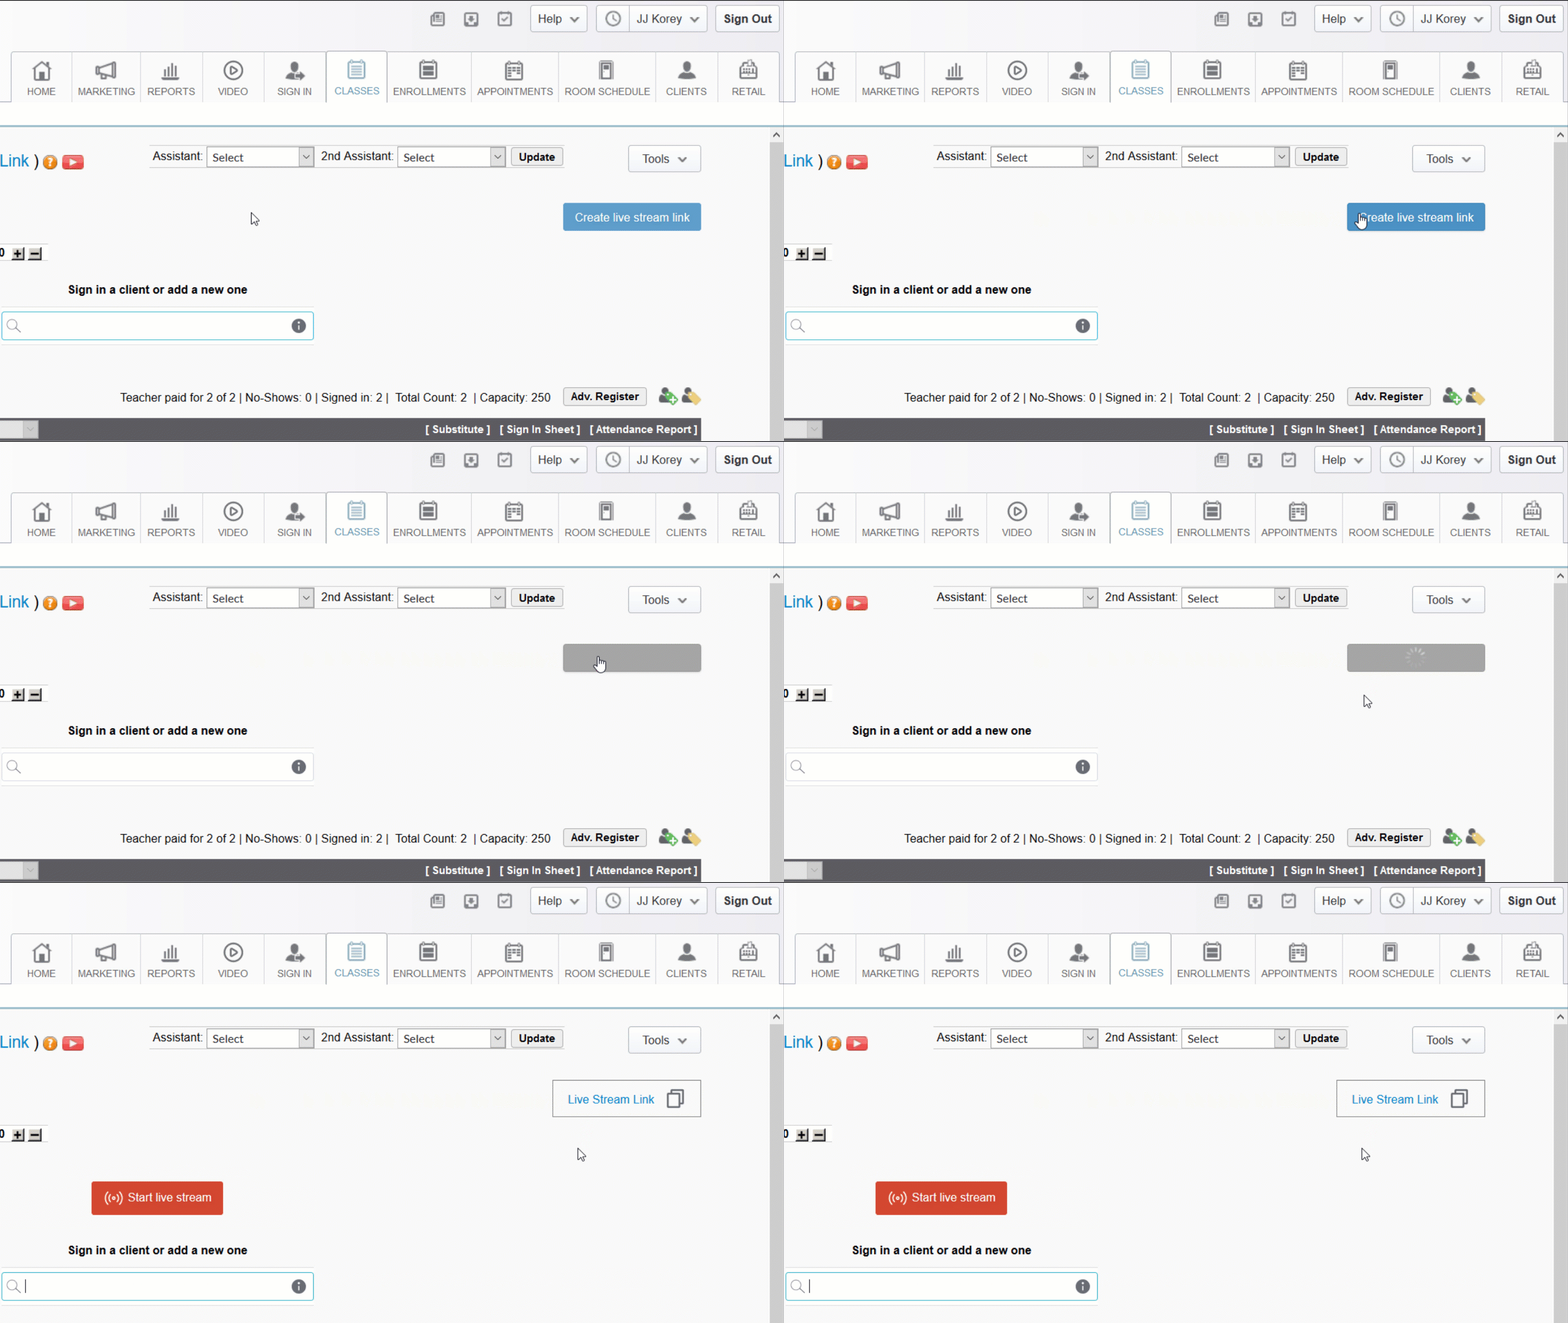
2. The Class Sign In screen will be very similar to what you’re used to, with a few small differences: A. The “Start live stream” button in the center of the screen and B. the “Live Stream Link” button.
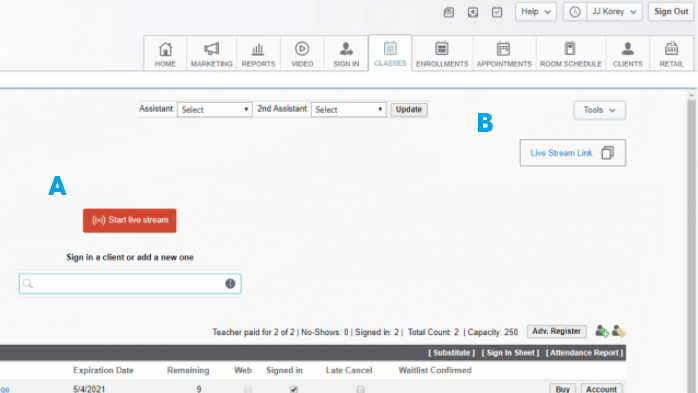
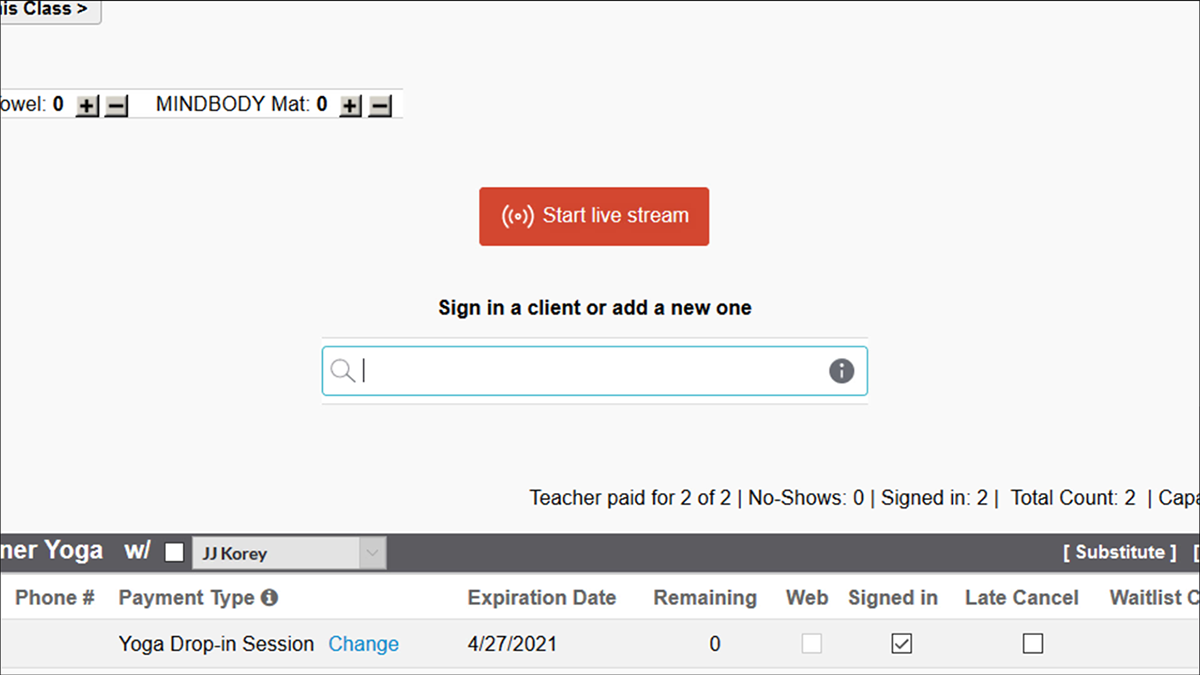
3. When you’re ready to begin your live stream, simply click the Start live stream button to open the live stream video platform.
(Optional) Activating live streams immediately
Your scheduled classes won’t start generating live stream links until the Live stream toggle for the service category has been switched on. At that point, it will take until midnight for the live stream links to be automatically generated for all classes within that service category.
If your first live stream classes are going to take place the day after, then you can then you are all set and can move to the next section.
If your first live stream classes are taking place immediately after toggling live streaming on, there is a one-time manual step you’ll need to follow. Within each scheduled class, the “Live Stream Link” button will say “Create Live Stream Link” instead. You’ll need to click the “Create Live Stream Link” button for each scheduled class that day. Be sure to click this button more than 30 minutes before the class begins to ensure your clients receive the automatic live stream link email.
