
Learning objectives:
The Business Information screen is where you'll provide the most important details of your business. This includes your location information, sales tax rates, time zone settings, the colors and logos you'd like shown in consumer mode, and how you'd like MINDBODY to contact you about important software updates.
Before you start, feel free to check out our accompanying support video on this topic:
Step 1: Accessing the Business Information screen
- Log in as the owner.
- Click the Home tab and select Manager Tools in the submenu.
- Choose Settings, and click on Business Information under Business Settings.
- Select one of the following links in the column on the left.
Step 2: Enter your location details
Here you can manage the physical addresses for each location at your business. Just select a location for your business (if necessary), enter your address details, and click Save. Any changes you make to your business information will be immediately shown in consumer mode, and will be carried over to the MINDBODY app in 24 hours or so.
- To learn more about best practices for filling out your Business Information screen, click here.
Business Location(s)
- Business address, City, State, and Zip: The street address of your business. This information will be publicly listed to your clients, so if your meet-up location is different from your business address, we recommend entering the address that you want your clients to see.
- Phone: The contact number that customers can use to reach your business.
- Contact name: The best person to contact at your business for information, such as a general manager or owner.
- Shipping address: If a location's shipping address matches its physical address, then you can save some time by ticking the checkbox beside "Same as business address."
- Time Zone: The time zone setting for your MINDBODY site.
- Amenities: Select the amenities you have at each location (e.g., Daycare, Showers, Food/Drink, etc.).
Location photos
When you click Manage location photos, you’ll be taken to the “Location Photo upload” screen where you can upload business images.
Here are some guidelines for your business photos:
- We recommend uploading a minimum of six photos to best represent your business.
- Images should be at least 375 x 295 pixels and smaller than 5 MB.
- Changes are saved automatically and the photos will appear in the MINDBODY app in approximately 30 minutes. You do not need to click “Done” to save your changes.
- Check to be sure you have at least one class scheduled per location to ensure your locations appear on the menu.
- The “Photos you could add” section shows stock images pulled directly from Google.
- The “Visible right now” section shows images that are live in the app.
- Upload your own images in this section by clicking the + Upload photo box.
- Click the three dots on each photo to set it as the cover photo, delete it, or crop it.
- Your default google images can be removed from the live section, but not deleted. Removing them will place them back in the “photos you could add” section.
Step 3: Entering your contact information
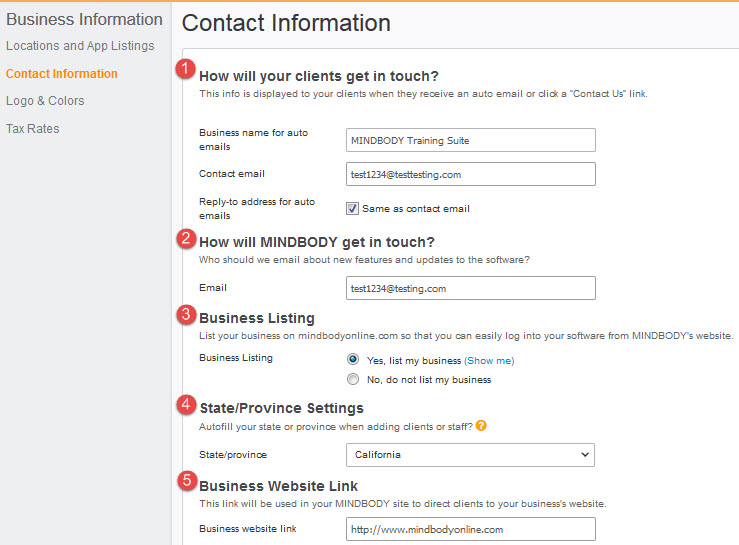
- How will your clients get in touch?
- Business name for auto emails: Enter a name that will appear when your clients replies to an auto email.
- Contact email: This is the email your clients will see when they're logged into MINDBODY as consumers.
- Reply-to address for auto emails: Check the box if it's the same as the contact email, or uncheck to enter an email address you want to appear when your client replies to an auto email.
- How will MINDBODY get in touch?
- Email: MINDBODY will use this email address to send you important information about new software features, planned maintenance, promotions, and other announcements. Please enter your preferred email address.
- Business Listing
- When enabled, your business will be listed on www.mindbodyonline.com. This allows your or you clients to look up your site online. When disabled, your site is only accessible through shortcuts, links from your website, or your MINDBODY website address.
- State/Province Settings
- State/Province: Is your business in Massachusetts? You probably hate typing Massachusetts every time you enter a new client. If you enable this feature, it will enter your state name automatically when setting up new teachers and clients.
- Business Website Link
- Website address: Enter the home page web address for your main website (we're assuming that your MINDBODY site is not your business's main website.) We will link your logo to this website address so that if people want to return to your main page, they can click on your logo.
- Note: If you leave this field blank, the replace phrase "<STUDIOURL>" used to include your business website link in your auto emails will not appear. Click here to learn more about auto email replace phrases.
Step 4: Customizing your site's colors and logo
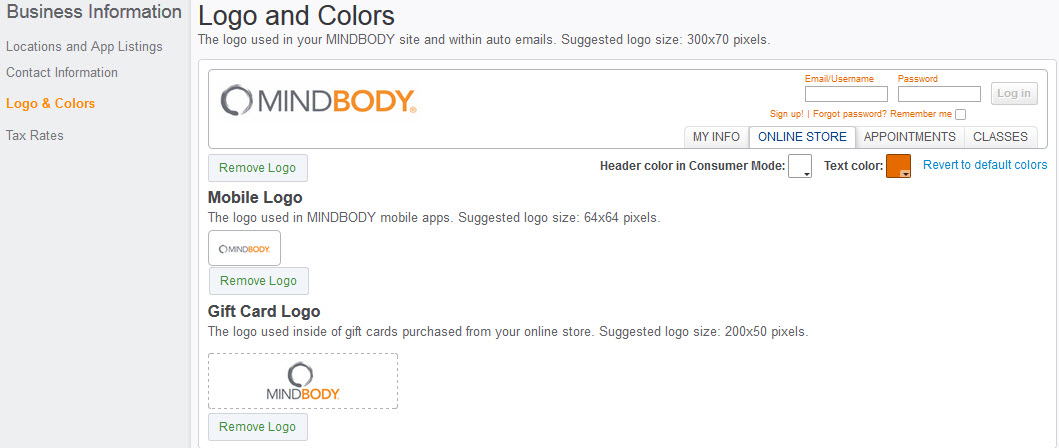
Business logo
Your logo displays in your MINDBODY site in the upper-left corner of the screen and in auto emails. If clients click on your logo, then a new browser window opens directing them to your studio website. For best results, use a logo that is 70 pixels high and no more than 300 pixels wide. To search for the file you want to use as a logo, click Choose Logo, and to delete the current image, click Remove Logo.
- Colors: You can customize the background color and text color that displays in your consumer mode header (what your customers see when they visit your site). Just click on the tiles directly below the header to see a preview of the colors, and click Select when you find a combination you like.
Mobile logo
This is the logo used when your services are displayed in MINDBODY's mobile apps. For best results, use a logo that is 64 pixels high by 64 pixels wide.
Gift card logo
This logo will display on gift cards that are purchased online. For the best results, use a logo that is 50 pixels high and no more than 200 pixels wide.
Step 5: Entering your tax rates
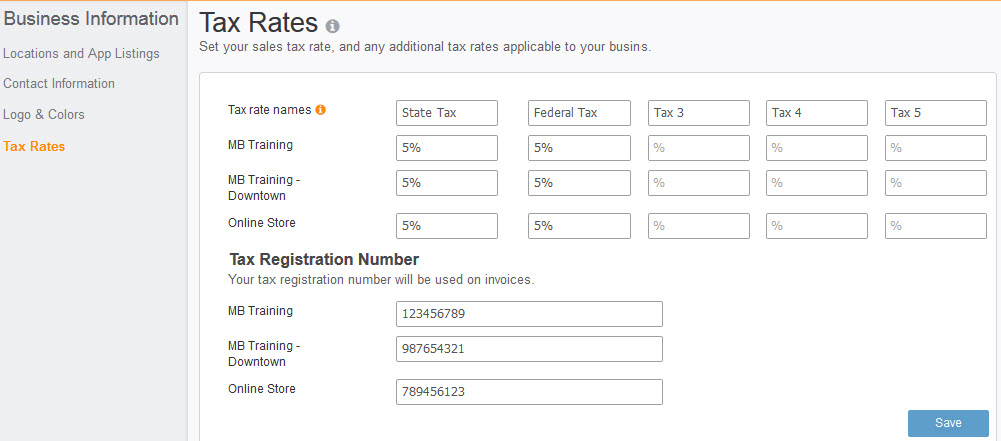
- Sales Tax: Your local sales tax rate will be entered here.
- Tax Rate(s) 2-5: Alternative tax rates can be assigned to products or services. A 0% tax rate indicates a rate of zero applied to products and services, and will appear on your reports; if you don't enter a rate, then "None" will display.
These fields support percentages, so you can input "7" for 7%. Only the tax rates being utilized by your business are displayed on the Pricing Options & Membership setup screens. If you have multiple locations, then all active tax rates across your business's locations will be displayed on the screen.
Click here for assistance with applying tax rates in MINDBODY.